📸 SNAPSHOT - Issue 87
Welcome to a brand new Issue of my Magazine. A truly brilliant one, enjoy the read :)
Sponsored by


In this Issue
Fujifilm’s New Camera And Lens
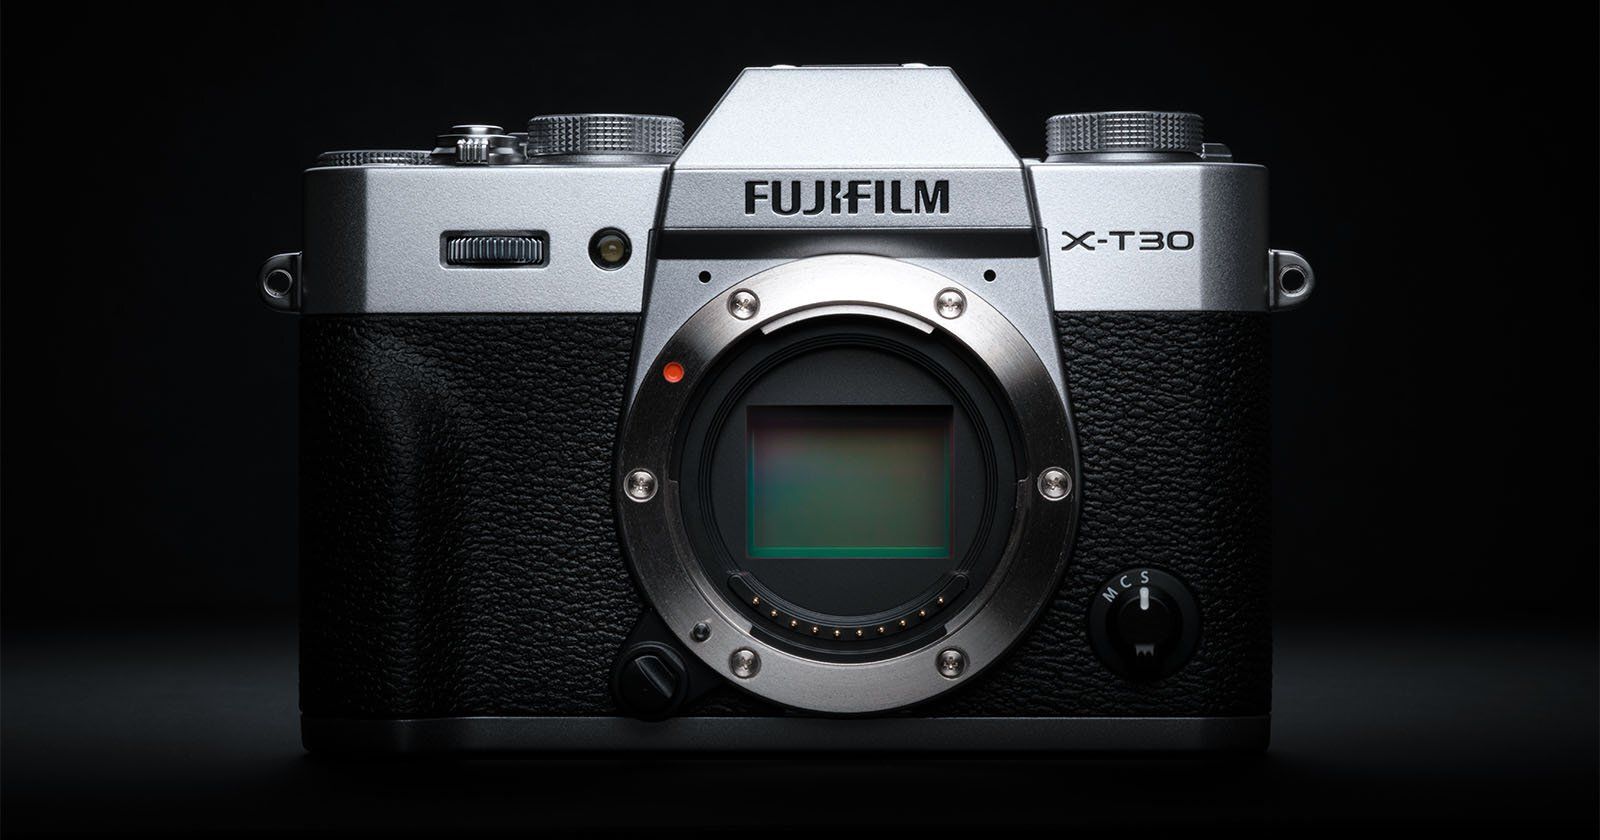
Fujifilm just announced the X-T30 III, the newest model in its compact mirrorless X series lineup. It is the company’s latest take on a relatively affordable, photography-focused camera, simple, fast, and built around the same 26.1-megapixel X-Trans CMOS 4 sensor that has been a workhorse in several Fujifilm cameras. What is new this time is the addition of the X-Processor 5, which gives the small body a surprising amount of extra speed, smarts, and battery life.
Fujifilm isn’t reinventing the wheel here, but the new processor does a lot. For starters, the X-T30 III now lasts longer, around 425 shots per charge when set to Economy Mode, and autofocus has gotten an upgrade thanks to Fujifilm’s latest deep-learning system. It can now recognise a wide range of subjects, from people and animals to cars, planes, trains, bikes, and even drones. The tracking system is the same one used in some of Fujifilm’s higher-end cameras, so it is a nice surprise to see it appear in something more compact and accessible.

On the video side, the X-T30 III can shoot 6.2K video at 30p in 10-bit 4:2:2 HEVC, along with 4K 60p and even Full HD 240p for slow-motion work. It also supports open gate recording, which basically means it uses the full area of the sensor. Fujifilm still markets this camera primarily for still photography, but the added power definitely makes it more capable for hybrid shooters.
Of course, no Fujifilm camera would be complete without its signature Film Simulations, and the X-T30 III includes the newer Reala Ace and Nostalgic Neg. profiles, bringing the total to 20. There is even a dedicated dial for switching Film Simulations right on top of the camera, which makes it easy to change the colour look on the go without digging into menus.

The rest of the design hasn’t changed much from the X-T30 II. It still has that classic Fujifilm aesthetic, compact, metal dials, and a centred electronic viewfinder. It weighs 378 grams (13.3 ounces) and measures 118.4 x 82.8 x 46.8 millimetres (4.66 x 3.26 x 1.84 inches), so it is easy to carry around all day. There is also an Auto mode for beginners, which automatically detects the scene and sets exposure and focus, though enthusiasts will likely prefer the manual controls Fujifilm is known for.
A small but genuinely useful new feature is the built-in Instax Link support. You can now connect the X-T30 III directly to Instax printers (no phone or app required) and even crop your shots to fit the Instax Mini, Square, or Wide formats before printing. It is a small detail yes, but a fun one for anyone who likes mixing digital shooting with instant prints.

The X-T30 III will be available in late November for $999.95 (body only), or $1,149.95 as a kit with Fujifilm’s new XC 13-33mm f/3.5-6.3 OIS lens, which also made its debut alongside the camera.
The new zoom lens is worth a quick look on its own. It is the smallest and lightest zoom Fujifilm has ever made for the X series, weighing only 125 grams (4.4 ounces) and measuring 37.5 millimetres (1.48 inches) long. When extended, it is still barely over two inches in length. The 13–33mm range gives it an equivalent field of view of about 20–50mm, so it is ideal for casual shooting, travel, and everyday photos. It is not the fastest lens, but it is sharp and practical.
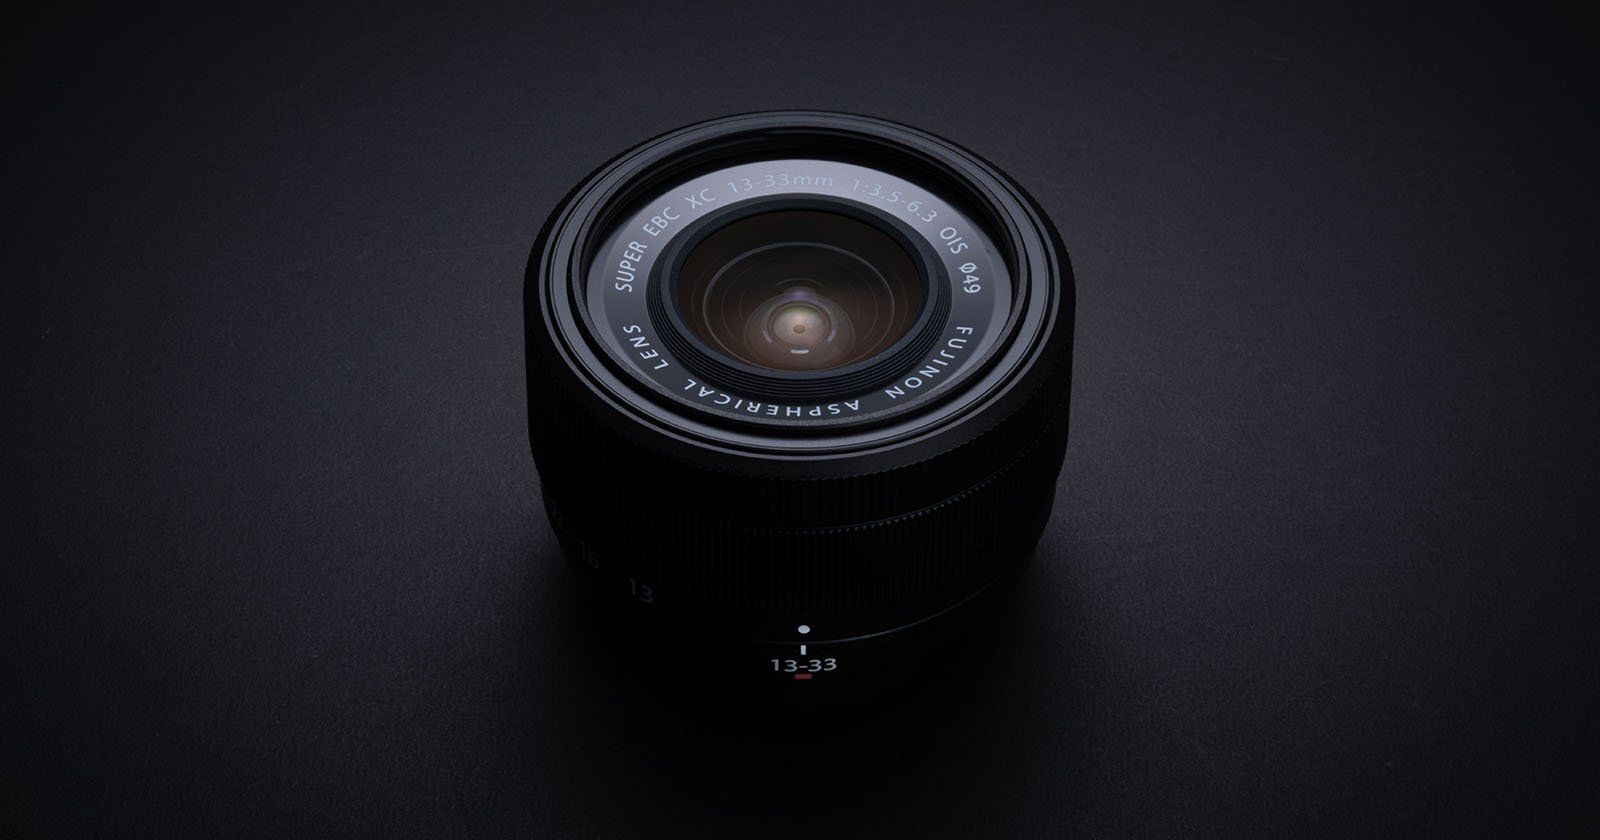
Inside, the lens has 10 elements in 9 groups, including four aspherical and three ED elements, along with a nine-bladed aperture for smoother background blur. It can focus as close as 20 centimetres (7.9 inches) across the zoom range, which gives it a 0.25x magnification at the long end.
Built-in optical image stabilisation helps compensate for up to four stops of camera shake, and Fujifilm says autofocus is as fast as 0.025 seconds, so it should feel responsive even on entry-level bodies.

The XC 13-33mm f/3.5-6.3 OIS lens will go on sale separately in January 2026 for $399.95, or as part of the X-T30 III kit starting in December.
Learn The Art Of Photography

Get full and free access to my Creator University - The World’s Best Online University for Photographers & Creatives: Get access to hundreds of amazing photography courses, learn from professional photographers, connect with students and much more!
Interview with Roger Jannsen
This week’s Interview with Roger, a talented photographer from Amsterdam. I am truly honoured to have had the opportunity to interview him again, this time with a closer look at his new work!
You can find him on Instagram as: @pictorlux
Enjoy the amazing Interview ;)

Can you tell us a bit about yourself?
My name is Roger, I’m Dutch and I live in Amsterdam. I work in IT during the day, but when I’m not behind a screen, I’m usually outside with a camera in hand. Photography’s one of my favorite hobbies, right next to traveling, scuba diving, and catching the occasional concert. Living in Amsterdam has definitely shaped what I shoot, it’s a city built for photographers, full of character, light, and reflections. Since we don’t exactly have grand landscapes here in the Netherlands, I naturally gravitated toward urban scenes. I actually love going out in bad weather, the kind of days when most people stay inside. Fog, snow, rain, that’s when the city feels alive to me. Still, I’ll never turn down a warm, hazy summer sunrise at 5:30 AM either.
How did you get into photography?
My dad worked as a graphic designer for an ad agency, and he filmed and photographed quite a bit for his job. I was often the unwilling subject in front of his camera, which I didn’t love back then, but once I got an old box camera of my own, something clicked. I was hooked. I always liked the idea of capturing moments, but it was really the digital era that pulled me all the way in. Being able to “develop” my own shots without a darkroom opened a whole new world for me. I could experiment endlessly and actually see the results right away, that made all the difference.

How do you approach shooting in low light situations, and what equipment do you use to achieve the best results?
When I’m shooting in low light I’m not too worried about the shadows or dark areas. I’m after the bits of light that make the scene come alive: the glow from street lamps, reflections on wet pavement, windows lighting up the fog. I always expose for the highlights and tend to underexpose a bit, usually between -0.7 and -2EV, to keep those lights from blowing out. My subjects are often silhouettes anyway, so I don’t need perfect detail in the shadows. I shoot wide open to get depth and separation, and I don’t mind raising the ISO if it means keeping my shutter fast enough. I mostly use fast, weather-sealed zooms anything from 24mm to 300mm equivalent so I can shoot no matter what the weather’s doing. And every now and then, I throw on one of my Voigtländer f/0.95 lenses just for the fun of it.
What is your dream shooting location and why?
That’s a tough one because there are so many places I’d love to shoot. New York City is definitely near the top, there’s just something about its energy and lights that fits the way I shoot. Paris and my own Amsterdam are up there too; they’re both incredibly photogenic cities that never really run out of angles. I’ve never been to Lisbon, but it’s on my list, and Etretat in France looks like a dream with those cliffs and the sea. Honestly, I’d even love to revisit the Grand Canyon now that I actually know what I’m doing with a camera. It’s more about how the place makes you feel than how iconic it is. A couple of months ago I visited Tuscany in Italy which was a pleasure.

What were the difficulties you encountered first starting photography?
In the beginning, I had no idea what I actually wanted to shoot. I didn’t have a direction or any focus, I just pointed the camera at random things and hoped for the best. My photos never looked like the ones in books or magazines, which was frustrating. I didn’t realize how much skill, patience, and practice went into making those kinds of images. And then there’s the cost; photography isn’t exactly cheap, especially when you start upgrading gear. But those early struggles were part of the process. Looking back, I’m glad I stuck through the trial-and-error phase because that’s where you start figuring out who you are as a photographer.
Do you think anyone can be a photographer? And if so, what do you think is the most important feature?
Yeah, I think anyone can be a photographer. The technical stuff can be learned, that’s not the hard part. What really matters is having a photographic eye, a kind of mindset where you see frames everywhere you go. It’s about noticing how light hits a wall, how people move through a scene, or how a certain mood hangs in the air. Some people just have that instinct, but even if you don’t, you can develop it by shooting a lot and studying your surroundings. You have to look at the world and immediately think, “that could be a photo.”

What gear do you use?
Right now, I shoot with Olympus gear, the Micro Four Thirds system. I’ve got three camera bodies that all fit in one small backpack, usually paired with my two main zooms: a 24–80mm f/2.8 and an 80–300mm f/2.8, both weather-sealed and fast enough for the kind of light I chase. I also keep a 35mm f/1.2 prime on one body most of the time. And when I want to have some fun, I mount one of my manual f/0.95 lenses, they’re a bit tricky to use, but the results can be magical. Every once in a while, I’ll also shoot 35mm film with my Olympus OM-2 SLRs or some old compact cameras. It’s slower, but it reminds me of why I started.
What is your favorite editing software, and how much time do you spend editing?
I edit in Lightroom, but I wouldn’t call myself a master editor. I’m a bit lazy with that side of things, I know there are tons of tricks out there, but I’d rather be out shooting. My editing process is pretty simple: I usually pick one image from a shoot, edit it until it looks right, then create a preset from it to use on the rest. That helps me keep the look consistent without wasting hours on every photo. Of course, I still have to make adjustments here and there, do some masking or dodging, but I try to keep it efficient. On average, I’d say I spend about 15 minutes per photo. Still, it always ends up being more time than I plan for.
What does photography mean to you?
For me, photography is the perfect creative outlet. It’s how I get outside, explore, and connect with my surroundings. It’s also a great way to meet new people or just clear my head after a long week. There’s something special about capturing a fleeting moment, knowing it’ll never happen exactly the same way again. Photography gives me that sense of presence that’s easy to lose in daily life.
How do you use lighting in your photos?
Lighting is everything in my photos. It’s the main character, really. In my moody, low-light shots, artificial light often shapes the whole composition. It can lead your eye, create color contrast, or just give the scene a sense of mystery. During the day, I love warm golden-hour light with long shadows, and I often shoot directly into the sun. It gives the image more energy and depth. I think if you pay attention to light first, everything else falls into place naturally.

What do you think makes your work unique?
I honestly don’t think my work is completely unique, everything’s been done before in some way. But I’ve been told people recognize my “Pictorlux light,” so maybe that’s what stands out. I guess the way I use artificial light and color has become a bit of a signature. I like to think it’s more about how I see things than what I shoot. You can photograph the same place as a thousand other people, but if your eye for light and timing is different, that’s enough to make it yours.
Any helpful advice for photographers who are new to the game?
Just shoot as much as you can. Don’t overthink it in the beginning, go out, experiment, and make mistakes. Get inspired by others, figure out what draws you to certain photos, and try to make that quality your own. Over time, you’ll develop your own style naturally. And most importantly, have fun with it. Shoot for yourself, not for social media or likes. The more you enjoy it, the better your work will become. It’s supposed to be creative, not stressful.

Dream photography gear?
Honestly, I already have everything I need to get the shots I want. But if we’re dreaming, I’d love to try a large format camera someday, just to experience that slow, deliberate process. And yeah, I wouldn’t say no to handling a proper Leica either, just for the feel of it.
Why is your Instagram name Pictorlux?
I actually thought about that name before creating the account. It comes from Latin “pictor” means painter and “lux” means light, so together it roughly translates to “painting with light.” It felt fitting, because that’s what photography is to me. It’s about shaping light into something expressive and emotional, not just documenting what’s in front of you.

Best photo location in Amsterdam?
My personal favorite is the Leidsegracht. It’s a small canal, but it’s packed with photographic opportunities from every angle. The light there in the morning and evening is just perfect soft, warm, and full of atmosphere. You can stand in one spot and still find five different compositions. If you scroll through my feed, you’ll see that canal popping up again and again. It never gets old.
What draws you so much to bad weather?
I think bad weather just has character. Anyone can go out on a clear, sunny day and take a nice shot, but rain, fog, or snow brings atmosphere. I also just like the challenge of it. Shooting in the cold or the rain isn’t comfortable, but that’s part of the fun. You work harder for the image, and that makes it more satisfying when it all comes together.
How does Amsterdam influence your photography style?
Amsterdam has this unique light and structure that makes you fall in love with geometry and reflections whether you want to or not. The canals, the narrow streets, the mix of old and modern architecture all forces you to think about lines and perspective. The weather helps too, because it’s constantly changing. You can go from bright sun to fog in the same hour. It keeps me on my toes, and it probably explains why I like moody shots so much.
What do you think makes a photo truly memorable?
For me, it’s light and simplicity. A photo doesn’t have to be complicated in fact, the best ones rarely are. It’s usually about catching one mood, one feeling, one moment that sticks. If someone looks at your photo and instantly feels something that’s what makes it memorable.

Do you still shoot film sometimes? What does it give you that digital doesn’t?
Yes, I still shoot film occasionally. It slows me down, which I like. With digital, it’s easy to take a hundred shots of the same thing, but with film, you think twice before pressing the shutter and you never know exactly what you’ll get until you develop it. It’s not better than digital, just different.
What’s your long-term goal with photography?

The rest, 6 more questions, of this Interview are for Premium subscribers only.
Peak Design’s New Straps And Tripod Plate

Peak Design rolled out a new set of minimalist camera straps and a redesigned Field Plate. The new straps, called Form, take Peak Design’s usual quick-connection setup and strip it down even further. They use the same Anchor Link system as the rest of Peak’s gear, but the design is cleaner overall, no visible stitching, no bulky hardware, no random bits hanging off. It is rated to hold up to 200 pounds, so despite how minimal it looks, it is fairly strong.
There are two styles, Form Rope and Form Leather. The Rope version uses a braided nylon and polyester mix that is stretchy but still strong, sort of like a climbing rope, just thinner. The ends are capped with reinforced nylon, so they should hold up for a while. The Leather version goes a different direction, made from full-grain ECCO leather with metal hardware.

Both straps come in fixed lengths, so you will have to pick the size that fits how you shoot, neck, shoulder, cross-body, or wrist. The Rope version comes in Black, Ocean, and Kelp, and the Leather one comes in Black, Amber, and Tan. Prices range from $39.95 for the shorter wrist option up to $79.95 for the full-size leather strap.
Then there is the Field Plate, which is kind of Peak Design’s take on making a basic camera plate less annoying. The main idea is a pop-up thumb screw that you can tighten or loosen by hand, no need for a coin, hex key, tiny tool. You just press it to pop up the handle, twist it into place, then press again to hide it.

The plate still fits with Peak Design’s other gear (the Capture clip, tripods, straps) but it is also compatible with most Arca-type tripod heads, so you don’t have to be locked into one system.
Both the new straps and the Field Plate are out now. The straps, again, start at $39.95, and the Field Plate is also $39.95.
Something You Have To Check Out
A W-2, a Laundromat Owner, & a Billionaire Walk Into a Room…

NOVEMBER 2-4 | AUSTIN, TX
At Main Street Over Wall Street 2025, you’ll learn the exact playbook we’ve used to help thousands of “normal” people find, fund, negotiate, and buy profitable businesses that cash flow.
Use code BHP500 to save $500 on your ticket today (this event WILL sell out).
Click here to get your ticket, see the speaker list, schedule, and more.
Photography Tip of the Week


The weekly photography tip is only accessible to Premium Subscribers of The Magazine For Photographers.
Photo Analysis
Welcome to the new part of the Magazine Issue where we take a closer look at a photo and analyse it so that you can learn and better your own photography from it ;)
Photo by: @nickmillers

Let’s Analyse this Image:
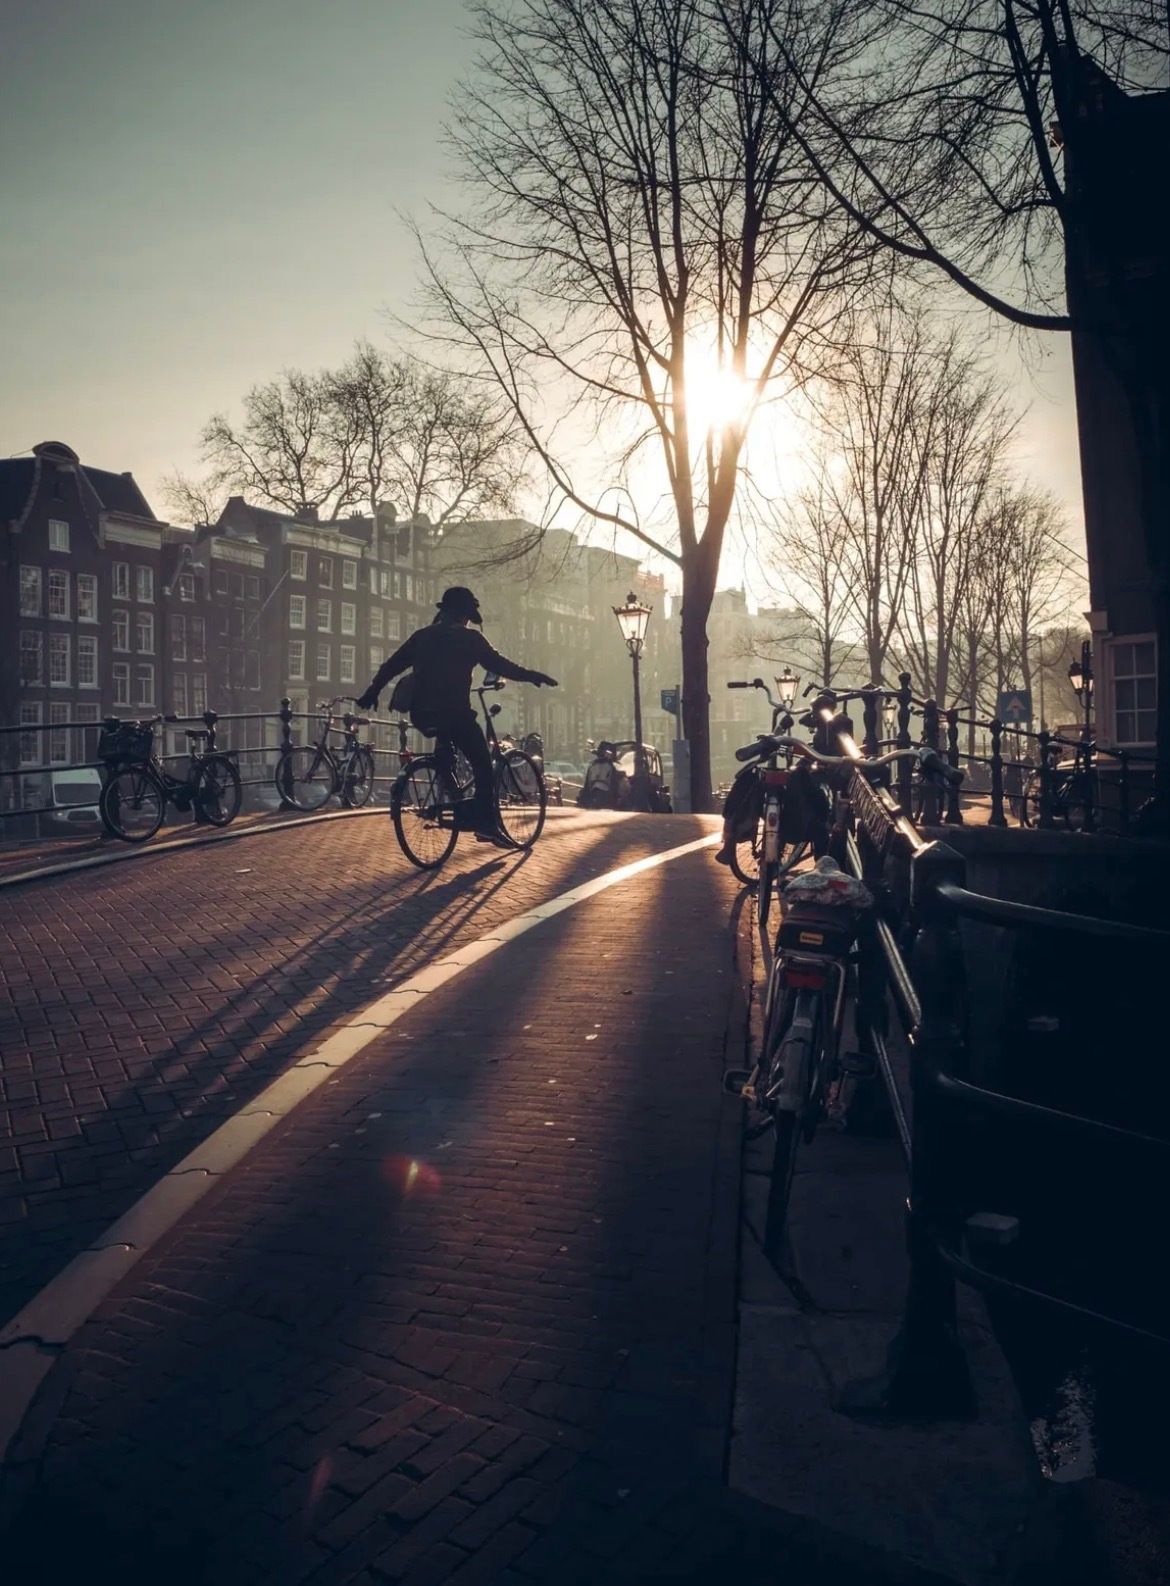
Composition & Framing
What works well:
The composition is pretty solid. The bridge acts as a huge diagonal leading line that pulls you straight into the sunset. It guides your eye naturally from left to right.
The people are placed perfectly within the scene —> they sit right under the sun, and because of that, it feels like the light is intentionally spotlighting them. It is very subtle, and if you don’t really think about it you might overlook that detail, but once you are aware of it, it is pretty satisfying.
There is also some, accidental-looking framing happening, the bridge on the left of course but also that single lamp post on the right kind of box in the subjects. It might not have been intentional, but it works, it kind of carves out a box in which our subjects are standing in..
The interplay of the leading lines, the light and our subjects is really cool, it is my favourite part, let me explain: the leading line of the bridge leads you obviously right into the sun, the sun shines a spot light onto the people, the sun gets attention all by itself since our eyes naturally go where the light is —> so if you were to see the two people first, you would instantly look up towards the sun and from there the bridge. Now, if you were to see the bridge first, that leads you into the sun and then to the subject. It all has this interesting, circular interplay and depending on where you, the viewer, look first the rest will follow naturally no matter where you start.
What could be better:
The “STOP” text on the ground (bottom left) is a bit distracting, it is not a huge issue, but it does catch your eye because it is right near the bottom of the frame, white and big. Slight reposition before shooting (literally moving a few steps forward) could have easily solved that.
The bridge structure on the left is powerful, but it is visually dense and heavy. It dominates the left side maybe a bit too much.
The left side is dark and, again, loaded with visual mass, maybe including a touch more of the right side (or lightening the left) would have balanced it out more.
Depth is solid thanks to the bridge and light, but the ground and shadows flatten out a bit, a slightly lower shooting angle might have emphasised the cobblestones and added even more depth.
Light & Atmosphere
What works well:
The light is warm and directional, perfectly positioned to fall just over the two people, as noted before, almost like a natural spotlight.
The atmosphere has a very calm feel to it. It looks like a cold, early morning. The glow off the water adds to that and ties everything together.
The long shadows stretching toward us are great —> they extend the subjects visually and ground everything.
What could be better:
The shadows overall are a bit too dark, especially under the bridge and around the buildings. There is a lot of texture and visual interest hidden in there that is just lost to black (the buildings in the background look just look like 2D cardboard cut-outs for example). Lifting the shadows even a little would have helped reveal more detail without breaking the mood.
The sun itself is gorgeous, but it is maybe a touch too bright (just a little bit), the surrounding area feels a little blown out, so toning it down slightly would have kept the glow without losing definition.
Emotion & Story
What works well:
The story here feels relatable and open-ended. To me it looks like a parent and a kid, just walking by the water before the day starts (maybe before the kid is heading to school). It is quiet, real, and relatable, which makes it emotionally effective.
The silhouettes add to the mystery, they let viewers fill in their own details and project their own feelings into it.
What could be better:
The story, of course would have been stronger with just a bit more visual context. For example, if the kid had a school backpack and the parent had a coffee cup (items we could clearly identify and see), we would instantly know what kind of moment it is —> a morning walk before school.
While the mood is nice, there is not much tension or surprise, it is a lovely little scene, but it doesn’t push beyond being visually calm.
Colour & Tone
What works well:
The colour palette fits the scene, warm oranges and yellows in the light, balanced by cool greys and shadows under the bridge. That warm-versus-cool contrast gives the photo depth and dimension (always good).
The overall tone feels natural and cinematic. There is definitely no over-editing (honestly it almost feels a little unedited hahah (not necessarily bat of course)) just the clean golden hour glow you get at the perfect time of day.
The soft transition from relatively warm sky to cool shadows creates a nice harmony across the frame.
What could be better:
The dark areas lean a little too flat and cold, lifting the tones slightly and adding a touch of warmth could help maintain balance.
Again, the building on the left could use a bit more tonal variation, right now, it feels a bit swallowed by shadow.
Balance
Overall, the balance is ok. The bridge on the left anchors the scene while the sunset and open sky on the right give it some breathing space.
The subjects and sun being lined up centrally helps everything feel naturally grounded, keeping the frame from tipping too heavily one way or another.
That said, the left side does feel visually dense, between the heavy bridge and shadows, it is heavier than the right.
The framing with the bridge and lamp post works surprisingly well, subtly boxing the main moment while still keeping the frame open enough to feel spacious.
Photographer of the Week
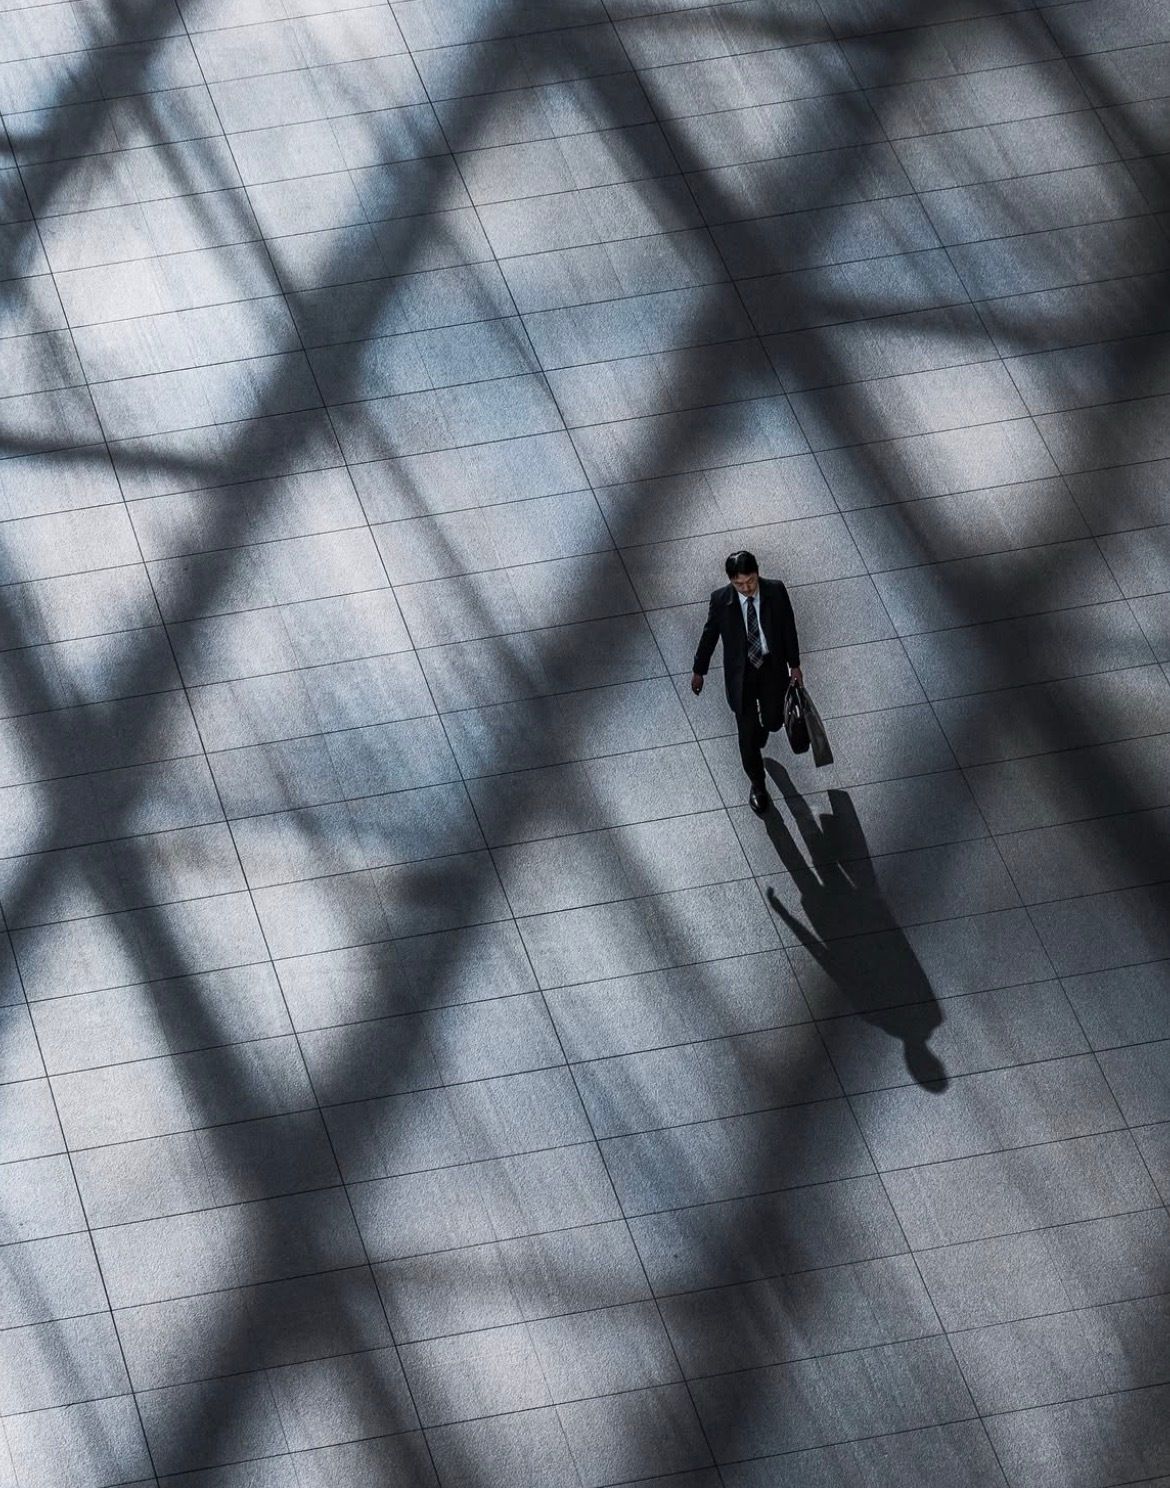
Photographer of the week goes to: Daisuke Arakawa
You can find him on Instagram as: @pon_photography_
A few photos of his:


The Rest of this Issue is for Premium Subscribers
