📸 SNAPSHOT - Issue 94
Welcome to a brand new Issue of my Magazine. A truly brilliant one, enjoy the read :)
In partnership with


In this Issue
Viltrox’s New Conversion Lenses

Viltrox has announced two new conversion lenses for Fujifilm’s X100-series cameras: the WCL-X100VI wide conversion lens and the TCL-X100VI telephoto conversion lens. Both are designed to mount directly to the fixed 23mm f/2 lens used across the X100 lineup, including the latest X100VI, and are intended to expand the camera’s effective focal length options without changing the core shooting experience of the system.
All X100 cameras use the same built-in 23mm f/2 lens, which produces a 35mm-equivalent field of view due to the APS-C sensor’s 1.5× crop factor. This focal length has long been a defining part of the X100’s identity, offering a natural perspective suited to street, documentary, and just everyday photography.

However, for photographers who want either a wider or tighter framing without resorting to digital crops, conversion lenses have historically been the only way to do so optically. Fujifilm introduced its own wide and tele conversion lenses years ago, with the most recent updates arriving alongside the X100F in early 2017.
The Viltrox WCL-X100VI is a wide-angle conversion lens that applies a 0.8× multiplier to the built-in lens, reducing the effective focal length from 35mm equivalent to 28mm equivalent. This change increases the diagonal angle of view from approximately 64 degrees to roughly 75 degrees, bringing the perspective closer to a classic wide-angle prime.
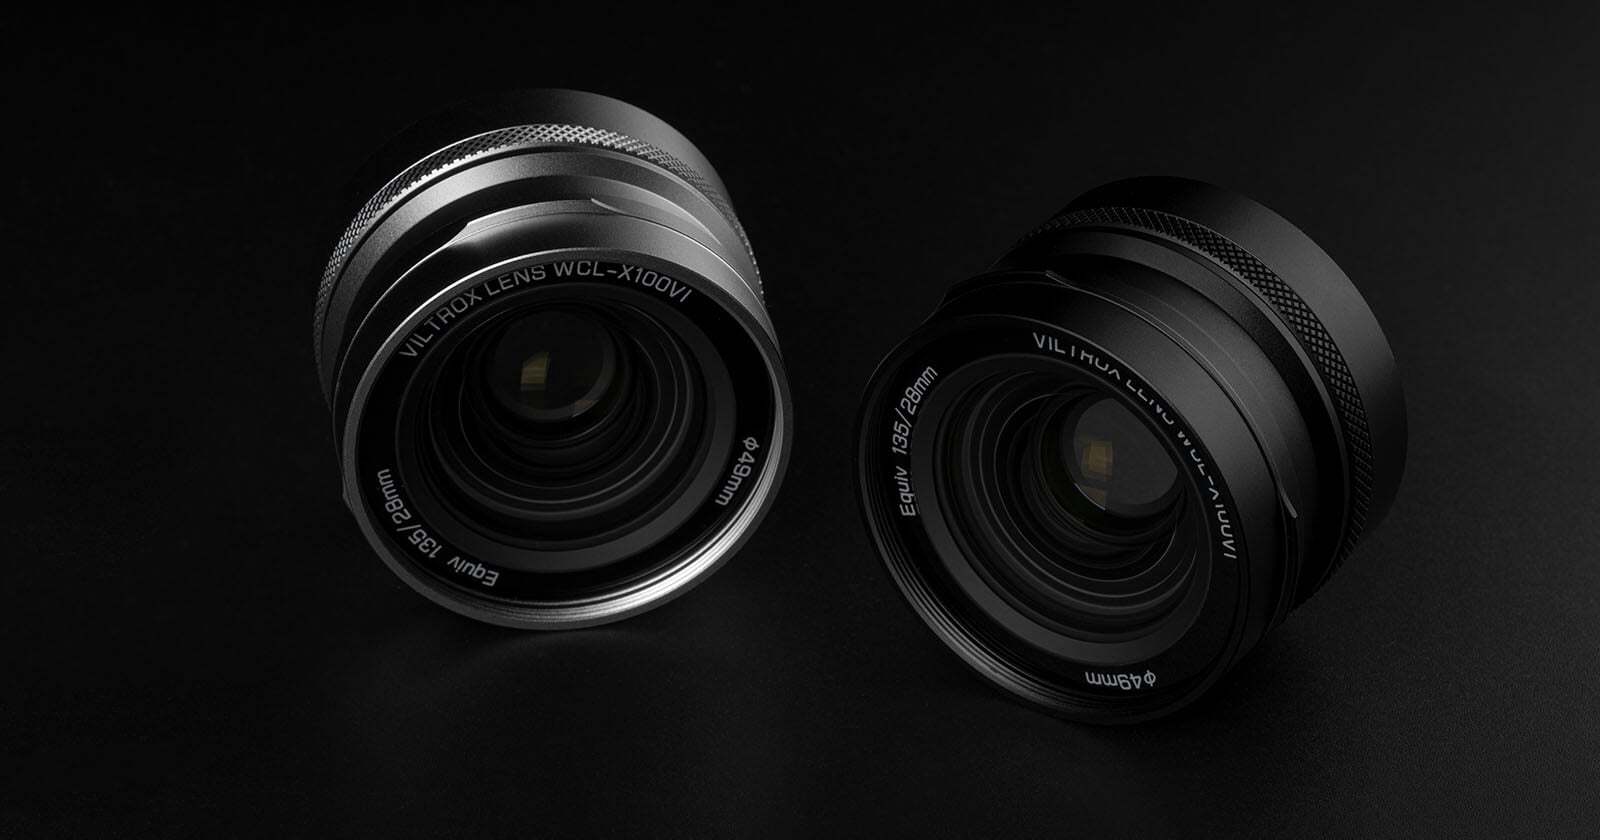
The lens is designed to maintain autofocus performance and metering behaviour identical to the native lens, with no need for manual adjustments. On fourth-generation and newer X100 models (including the X100F, X100V, and X100VI) the camera automatically detects the wide conversion lens and applies built-in distortion correction and vignetting compensation.
From an optical standpoint, the WCL-X100VI consists of five elements arranged in four groups. Two of these elements use high-refractive-index glass, which helps control distortion and maintain edge sharpness when expanding the field of view. Viltrox states that the design aims to minimise degradation in contrast and resolution, particularly toward the edges of the frame, which is a common challenge with wide conversion optics.

The front element features a coating intended to reduce flare while also repelling water and dust. Physically, the lens adds approximately 36.6mm (1.44 inches) of length to the camera and includes a 49mm front filter thread, matching the filter size commonly used on the X100 series when paired with Fujifilm’s adapter ring.
In parallel, Viltrox has released the TCL-X100VI telephoto conversion lens, which applies a 1.4× magnification factor to the built-in 23mm lens. This results in a 50mm-equivalent field of view, providing a tighter, more traditional short-telephoto perspective. As with the wide converter, the telephoto lens is compatible with all X100 models and is automatically recognized by newer cameras for correction profiles. This ensures that distortion and light falloff are addressed in-camera without requiring post-processing intervention.

The TCL-X100VI also uses a five-element, four-group optical design, but with a slightly different material mix. In addition to two high-refractive-index elements, the telephoto converter incorporates an extra-low dispersion element to help control chromatic aberration, particularly along high-contrast edges.
The telephoto unit is larger and heavier than the wide converter, weighing 230 grams (8.1 ounces), and increases the overall length of the camera by approximately 45mm (1.8 inches). Unlike the wide converter, it uses a 67mm front filter thread, which allows for larger filters but also represents a step up from the X100’s native 49mm size.
One aspect worth considering is how the TCL-X100VI interacts with the X100VI’s updated digital teleconverter modes. The X100VI’s 40-megapixel X-Trans CMOS 5 HR sensor enables in-camera crops that simulate 50mm and 70mm equivalent focal lengths at 20MP and 10MP resolutions, respectively.
When the 1.4× telephoto conversion lens is attached, these digital teleconverter modes extend further, effectively providing 70mm and approximately 100mm equivalent fields of view while maintaining the same output resolutions. This combination offers a broader range of focal lengths without additional optical changes, though image quality will still depend on both the optical converter and the digital crop.
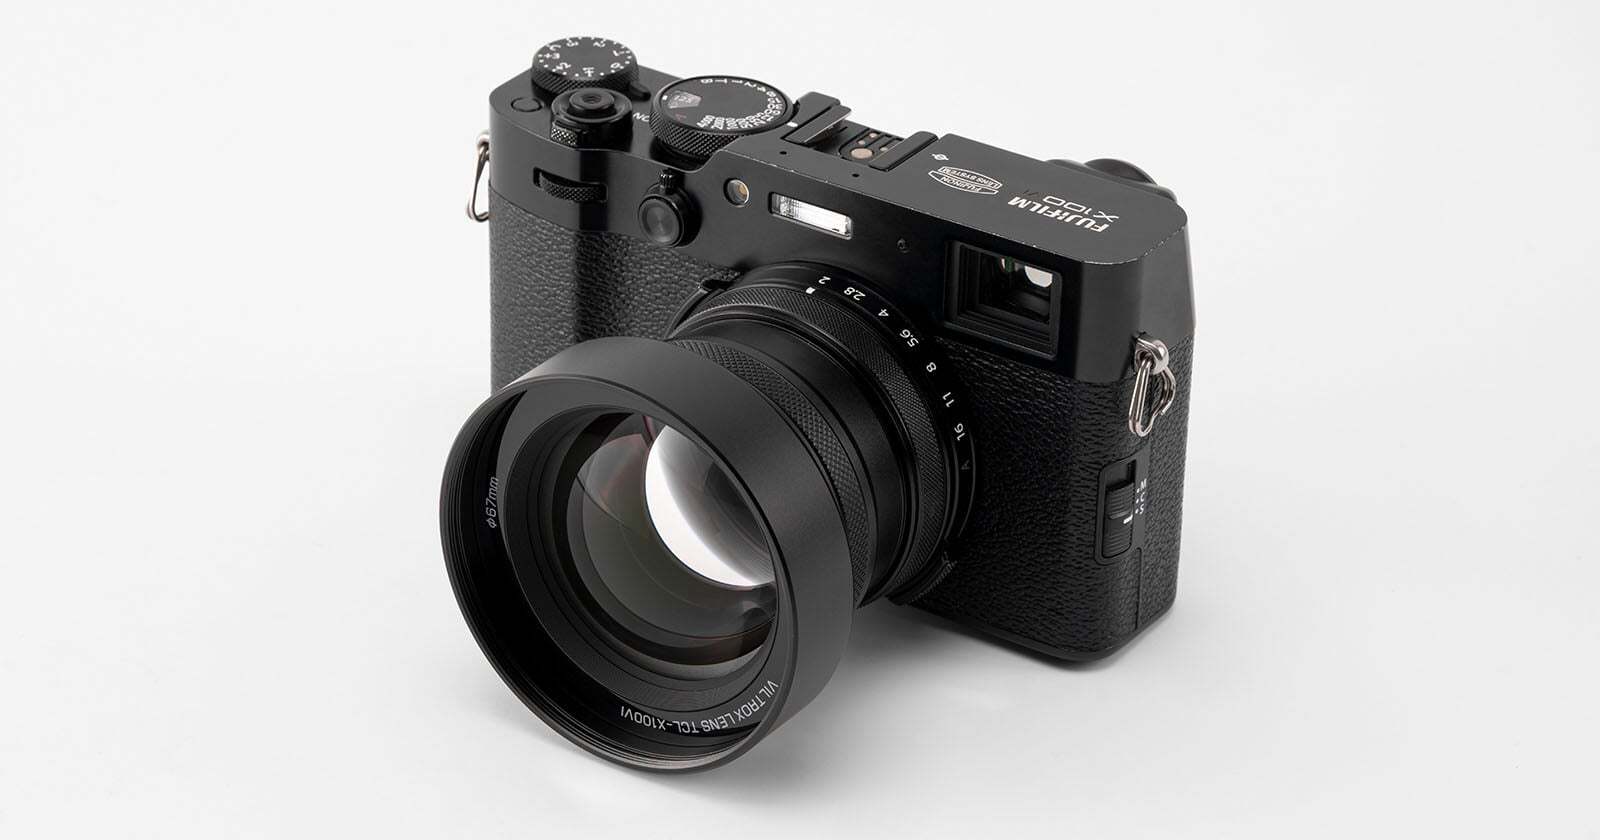
Both the Viltrox WCL-X100VI and TCL-X100VI are available in black and silver finishes to match the aesthetic of the X100 cameras. The WCL-X100VI wide conversion lens is priced at $159, while the TCL-X100VI telephoto conversion lens is priced at $189.
Learn The Art Of Photography

Get full and free access to my Creator University - The World’s Best Online University for Photographers & Creatives: Get access to hundreds of amazing photography courses, learn from professional photographers, connect with students and much more!
Interview with Nico Babilon
This week’s Interview with Nico, a talented photographer from Germany. I am truly honoured to have had the opportunity to interview him!
You can find him on Instagram as: @babilongrafie
Enjoy the amazing Interview ;)

Can you tell us a bit about yourself?
Hi, I'm Nico, 33 years old. I originally come from a small town in Southern Germany. I studied economics on Lake Constance, which is also where I met my wife. Together, we moved to Hamburg in 2017, basically from one end of Germany to the other. Professionally, I work full-time as a Team Lead in Marketing for an e-commerce company that sells customized furniture. Additionally, I run a side business as a photographer and manage a small online shop.
How did you first get into photography?
I first got into photography when I bought my first DSLR, a Canon 40D, for my 18th birthday. After that, I spent a lot of time experimenting. Back then, I mainly focused on portrait photography because many of my friends wanted nice pictures of themselves. That was a lot of fun and I learned a great deal about light and perspective in the process. Other than that, I simply photographed everything that caught my eye, from macros and architecture to self-portraits.

Why architecture photography?
My photography style significantly changed when I moved to Hamburg. Before that, I primarily focused on landscapes. Since Hamburg is a metropolitan city with a lot of sights, I started photographing them instead. I enjoyed it so much that I gradually focused more and more on it. Today, I feel that I have truly arrived in architecture photography. I really love the challenge of capturing sights that have been photographed a thousand times, but in my own unique way. And occasionally, you even find a perspective that few people have ever seen before.
How do you decide where to go and shoot?
In Hamburg, we have the classic photo spots like the Speicherstadt, the Alster, or the Harbor. It’s always worthwhile to visit these places when the light is good, especially at sunrise. Beyond the classics, I often simply walk through the city, actively looking for motifs. When I travel, I usually research in photography forums or just use Google Maps and search. Of course, Instagram is also a great source for finding interesting spots.

How does photography mean to you?
What I especially love about photography is the ability to experience places differently. Without my camera, I would never set my alarm for 4 AM to photograph the Opera House in Oslo. These moments, where you are almost completely alone and can enjoy the silence, are absolutely unique and precious. Furthermore, it’s a wonderful way (especially via Instagram) to connect with like-minded people. When I first moved to Hamburg, the local community, igers hamburg, helped me get to know the city from a whole new perspective during many photo walks, experiences I would never have had alone. For example, we once drove through the city in a group usingvintage cars and discovered amazing photo spots. That significantly eased my move to Hamburg.
What gear do you use?
I have always worked with Canon cameras. I started with a 40D, then spent a long time using the 5D Mark II. In 2020, I switched to the first mirrorless Canon EOS R. Just this week, I bought the Canon EOS R5 Mark II. I am very excited to see how (or perhaps if!) my photography will change and evolve as a result. My current lens setup consists of:
RF 15-35 mm 2.8 L, RF 24-70 mm 2.8 L, RF 70-200 mm 2.8 L, RF 100-500 mm 4.5-7.1 L
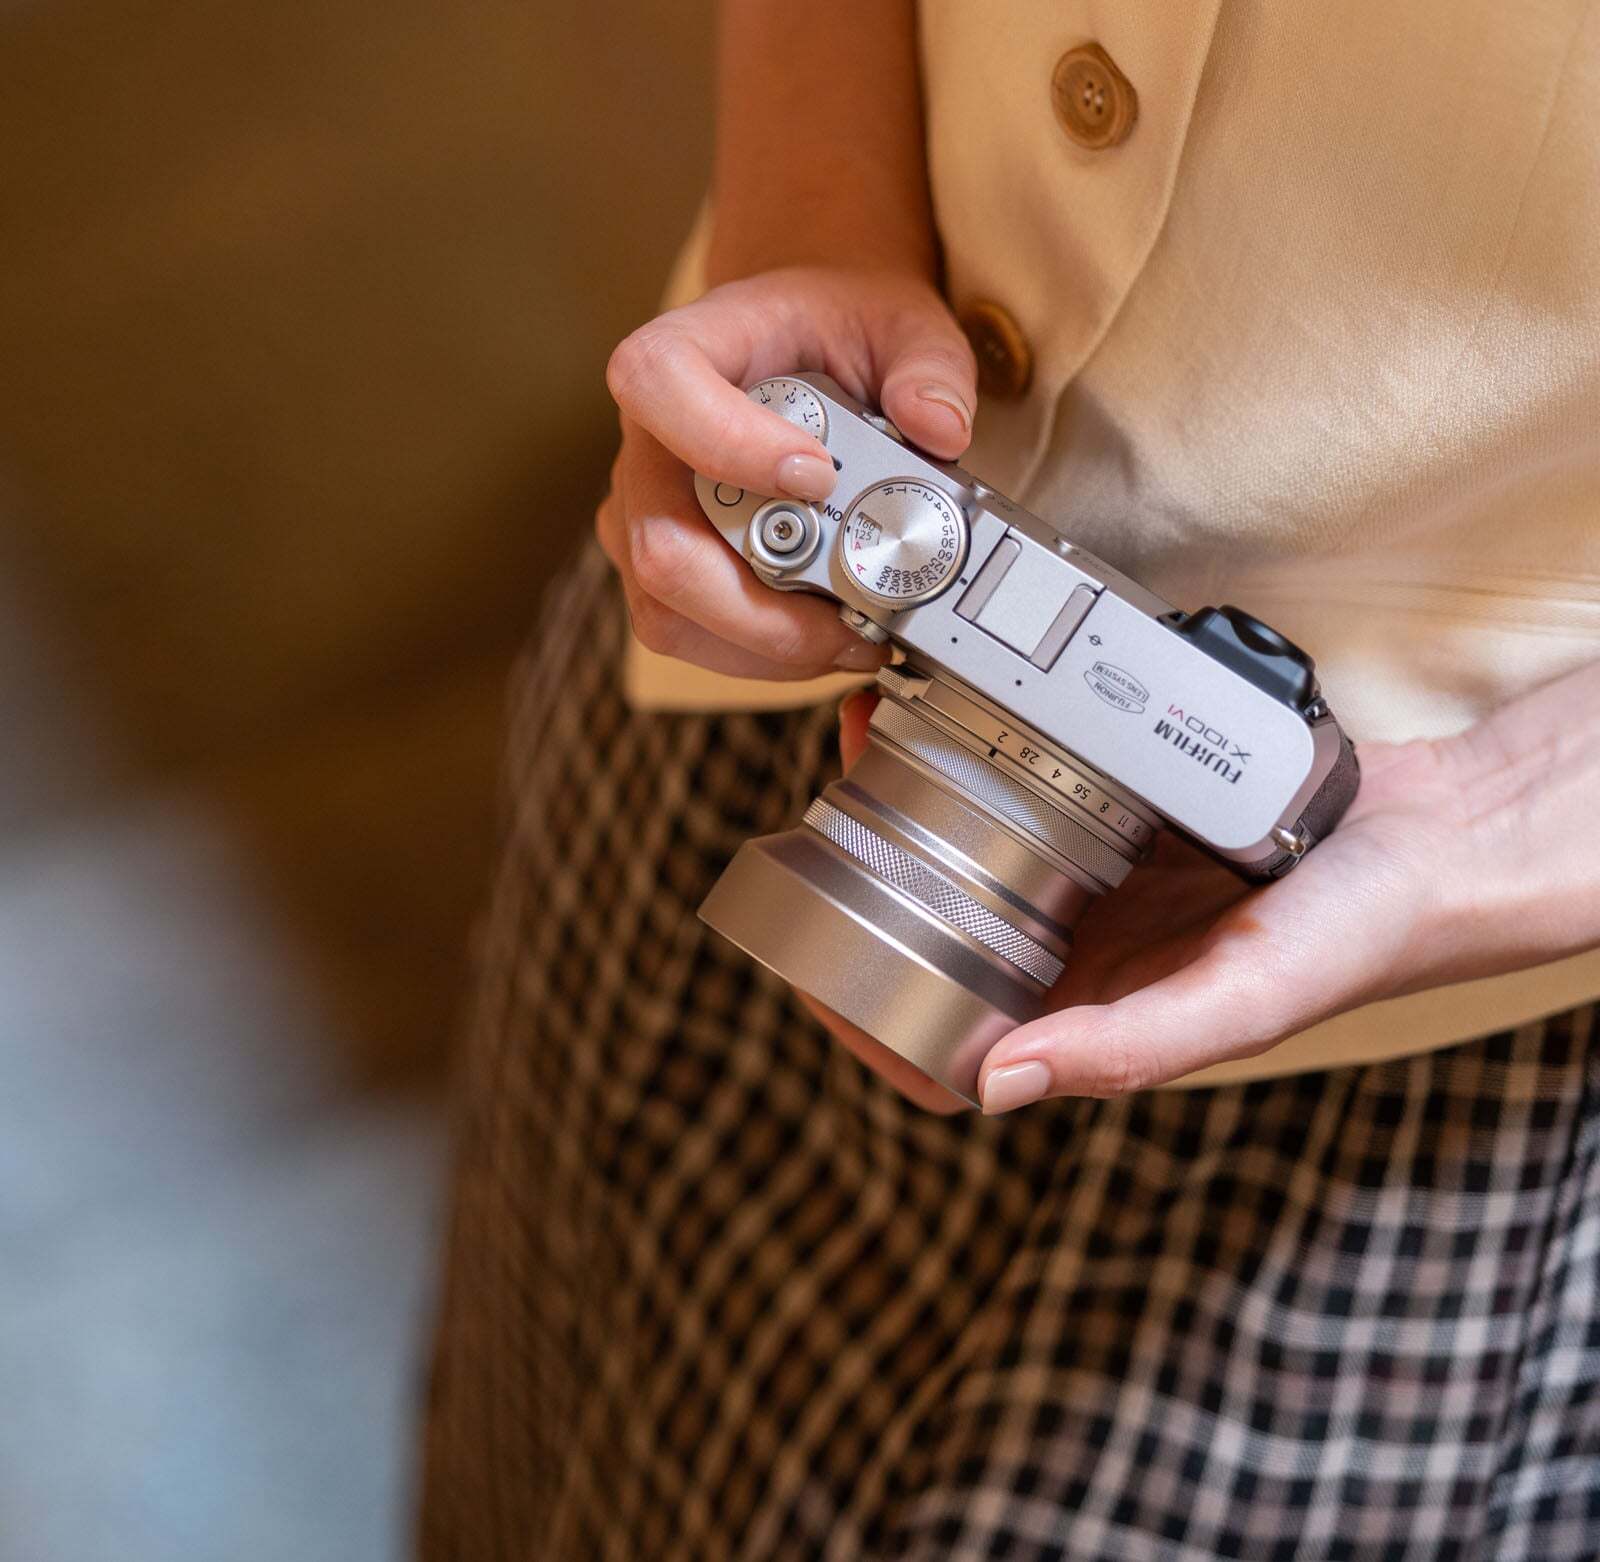
Additionally, for the last two years, I have been using a Fuji X100V as my everyday camera, which has since completely replaced my iPhone camera. Every once in a while I also fly my DJI Mini 4 Pro drone. But due to regulations, that gets more and more difficult.

Do you prefer shooting in the chaos of a busy street or in quieter, more intimate spaces?
That depends... both have their merits. However, having a major city almost to yourself in the morning (though in Hamburg you almost always run into other photographers early on) is truly special. Recently in New York, we were at the Rockefeller Center for sunset, and you almost had to fight for a good spot. So, I would definitely say that I prefer the quieter moments in the early morning.
What are your favourite shooting conditions? (Rain, day, night, sunny days etc.)
That depends on the season and the city. I generally prefer shooting early in the morning for sunrise. But I also absolutely love fog. With a bit of luck, in autumn you can experience the Harbor and the Speicherstadt in a mystical atmosphere that makes a photographer’s heart beat faster. (Perhaps you even noticed me through my fog photos?)

How do you decide on what moments to capture and which ones not? Or do you just shoot everything?
I definitely do not shoot everything. I also hardly ever use the continuous shooting speed of modern cameras. My approach is much more selective. I often take my time to observe the scene first. Especially in architecture, I look for the perfect combination of light, lines, and maybe an element of human interaction that definesthe moment. I wait until the light hits a facade just right or until a person crosses a specific part of the frame. I only press the shutter when I feel that all these elements have come together to form an ideal composition. For me, it's about capturing the decisive moment rather than shooting a high volume and selecting later.
What are some of your favourite photography techniques and why?
One of my biggest 'tricks' is not actually a camera technique, but knowing how to use the 'Golden Light' the hour shortly after sunrise and just before sunset. During this time, the light is soft, warm, and creates long, flattering shadows. It automatically gives almost any subject a magical and cinematic mood. I also often try to utilize backlighting, especially for freestanding subjects. It helps separate the subject from the background and can create a beautiful outline or rim-light effect.

How did you find your unique photography style?
That's an interesting question. I wouldn't necessarily call my style 'unique,' but rather the result of constant evolution and exploration. Like many photographers, I experimented a lot in the beginning and yes, when I look back at some of my old edits today, I often wonder what I was thinking! But this phase of testing and filtering was essential. I learned what felt authentic to me and which aesthetics I didn't want to maintain in the long run.
Do you see yourself as an architectural photographer, street photographer, landscape photographer…? And why?
I primarily see myself as an Architectural and Cityscape Photographer. This is the area that sparks my greatest passion. What fascinates me about major cities is the clear geometry, the patterns of the architecture, and the challenge of bringing the dynamic urban environment into a calm composition. I simply enjoy capturing the play of light and shadow on these structures. While I also love taking landscape photos when traveling as a contrast, my clear focus and preference lie with architecture and cityscapes.

If you could travel anywhere in the world where would that be and why?
I already fulfilled a huge dream of mine this year with a trip to New York City. Experiencing that city with my own eyes was absolutely fantastic. I captured almost every single sunrise and sunset—which, admittedly, was quite exhausting in the long run. My next big dream destination is Namibia. It would be a complete contrast to the dense cityscape. I imagine the wildlife and landscape photography there would be incredibly exciting and challenging. I'm especially drawn to the vast, open desert landscapes, the unique light, and the opportunity to capture animals in their natural habitat.
What’s the most challenging thing about photography for you?
The biggest challenge for me is probably mastering my Lightroom catalogs. I have so many photos that still need to be edited, but post-processing is a huge time sink. Often, I simply don’t feel like doing it and would much rather go out and shoot—which, of course, only means that I’ll have even more work to do later! It’s a constant, self-made cycle that I struggle to break.

What are the best photography locations in Hamburg?
Naturally, you have the classics like the Speicherstadt, the Elbphilharmonie, the Harbor, and the Alster. However, locations like the Dockland, the Chilehaus, or the picturesque neighborhood of Blankenese are always worth a visit, too. They offer great variation, from modern architecture to historic brick buildings and natural riverside views.
What is your favourite subject to shoot?
Since I now almost exclusively focus on architecture photography, I definitely count that as my favorite subject.

Are you a professional or a hobbyist?
I define a professional photographer as someone who earns their living exclusively from photography full-time. Therefore, I classify myself as a Semi-Professional Photographer. While the income is a nice bonus, I am not dependent on the work to cover my living expenses. I specifically want to maintain this part of the 'hobby' it ensures that my photography remains driven by passion and not purely by necessity.
Who are some photographers or other artists that inspire you?
There are quite a few. Locally in Hamburg, I often go shooting with Dominik (dmnk.visuals). Not only is his style of photography fantastic, but he is also a really great guy. A German photographer whom I also deeply admire is Matthias (mathias.koch_). The way he chooses to show the world is very unique and special. Among the international photographers, I really like the work of Luke (withluke). His visual approach and aesthetic are very appealing to me.

How do you know when you’ve nailed the shot? Is it instinct or something else?
It’s absolutely an instinctive feeling combined with a physical reaction. I know I’ve nailed the shot when the adrenaline and endorphins rush through my body because all the conditions—the light, the lines, the mood—have suddenly aligned perfectly. It’s not about seeing the result on the back of the camera; it’s the immediate, intense feeling of having captured that fleeting moment where the composition is flawless. That rush is my personal confirmation that I got the shot I came for.
How important is composition in photography?
Composition, next to proper lighting, is one of the most important elements in photography. It is the fundamental framework of a strong image. However, I often catch myself shooting purely intuitively, without actively or consciously thinking about specific compositional rules in that moment. That's actually something I want to work on in the future: being more deliberate and aware of the composition as I shoot.

What’s your advice for someone who wants to start with photography?
Practice makes perfect.The key is to constantly practice, practice, practice and then be highly self-critical. After a shooting session, you should look at the images on your computer and actively think about what you like about the picture and why—and, more importantly, what you don't like.By consistently analyzing your own work and focusing on elements like light, composition, and mood (which become even more critical in monochrome), you can improve your work piece by piece.
How important is lighting in photography?

The rest, 5 more questions, of this Interview are for Premium subscribers only.
ACDSee Photo Studio 26
ACDSee has released Photo Studio 26, introducing a new version of its photo editing and digital asset management software aimed at macOS users who prefer a fully local workflow and a one-time purchase model. The release places ACDSee in direct competition with subscription-based platforms such as Adobe Lightroom and Capture One, which currently dominate the Mac photography software landscape.
For many photographers, the choice on macOS has long been limited. Adobe’s Lightroom ecosystem relies heavily on subscriptions and cloud-based features, while Capture One’s pricing and catalog complexity have steadily increased over time. Both approaches can introduce friction, particularly for photographers working with large libraries, high-resolution RAW files, or tight turnaround schedules. ACDSee is positioning Photo Studio for Mac 26 as an alternative that avoids imports, cloud dependency, and ongoing fees.

At the core of Mac 26 is a fully local workflow. Images are browsed directly from disk rather than imported into a catalog, allowing you to begin culling and editing immediately. This approach is intended to reduce delays associated with building catalogs or syncing files, which can become increasingly slow as libraries grow.
The new version also integrates several AI-driven tools, though ACDSee emphasises practical automation rather than generative or cloud-based features. One of the headline additions is AI Keywords, which analyses images locally and assigns searchable metadata without requiring manual tagging or online processing. Unlike Lightroom’s cloud-assisted search tools, all analysis happens on the user’s machine, with no uploads involved.

Noise reduction is another focus area. AI Denoise runs locally and is designed to reduce high-ISO noise while preserving fine detail. ACDSee says the tool avoids generating large intermediate files and processes quickly, even on modest Mac hardware. The company positions this as a more efficient alternative to noise reduction workflows that rely on external plugins or cloud computation.
Batch processing has also been expanded. AI Presets evaluate images individually within a batch and apply adaptive adjustments rather than identical settings across every file. This allows exposure, contrast, and tonal corrections to scale more naturally across varied lighting conditions, reducing the need for manual fine-tuning after batch edits are applied.

Beyond AI features, Photo Studio for Mac 26 includes a full set of traditional editing tools. These include Light EQ™, Colour Wheels, Tone Wheels, Clone & Heal, and selective adjustments. ACDSee says performance has been optimised for modern, high-resolution RAW files, with reduced lag during Develop-mode adjustments compared to earlier versions. The Manage-to-Develop workflow has also been refined to make culling, rating, and editing feel more continuous.
Additional tools include AI Super Resolution, enhanced facial recognition, and expanded filtering options based on camera model, file type, ratings, and capture date.

From a business model standpoint, Mac 26 continues ACDSee’s pay-once strategy. The software runs entirely offline, with no mandatory subscriptions and no requirement to upload images to external servers.
ACDSee Photo Studio for Mac 26 is priced at $99.99 USD.
Get your Photos featured in this Magazine for Free
I am currently testing a new feature, where everyone can get a completely free chance to be featured in my magazine and get seen by thousands of photographers.
Advertisement (Absolutely make sure to check it out) ⬇️

This newsletter you couldn’t wait to open? It runs on beehiiv — the absolute best platform for email newsletters.
Our editor makes your content look like Picasso in the inbox. Your website? Beautiful and ready to capture subscribers on day one.
And when it’s time to monetize, you don’t need to duct-tape a dozen tools together. Paid subscriptions, referrals, and a (super easy-to-use) global ad network — it’s all built in.
beehiiv isn’t just the best choice. It’s the only choice that makes sense.
Photography Tip of the Week


The weekly photography tip is only accessible to Premium Subscribers of The Magazine For Photographers.
Photo Analysis
Welcome to the new part of the Magazine Issue where we take a closer look at a photo and analyse it so that you can learn and better your own photography from it ;)
Photo by: @laura.gzo

Let’s Analyse this Image:
Composition & Framing
What works well:
The natural corridor created by the buildings on each side is pretty great. It funnels your eye straight toward the man and then continues upward to the dome, all of that creates a strong sense of depth and a nice 3D effect.
There are leading lines here, but they are subtle, especially the two yellow stripes on the ground. The car headlights behind the man, in a way, also count as leading lines/an attention magnet. Not only do they create a strong spotlight effect that separates him nicely from the background, but also —> your eye naturally goes straight to that bright area first (because your eyes always seek out light naturally).
The layering is really strong, we have the foreground wet street, then the man, then the car and headlights, and finally the dome in the distance. It all stacks nicely and again gives the image a lot of depth.
What could be better:
The leading lines (those two yellow lines) could have been pushed a bit further. A slightly different shooting position/perspective right then and there could have exaggerated those lines more. Or even in post, boosting the saturation or brightness of the yellow lines just a little could have helped strengthen their guiding effect.
The dome is very prominent and well-lit, which almost makes it a second subject. If the intention was for the man with the umbrella to be the only subject, slightly darkening the dome could have reduced that competition. (So, as ever so often it entirely depends on what you are going for)
Light & Atmosphere
What works well:
The atmosphere is, I would say probably the strongest part of this image. The rain, the wet ground, the colours, the scene itself set the mood and give it a very cinematic type of vibe
Again the background separation (because of those bright lights) is very nice, the man is dressed quite dark so without those lights he would probably disappear a lot more into the background → we can really see that with the umbrella → since it is nor really in the headlights it immediately fades more into the background
Those rain streaks and reflections on the ground add nice texture and movement, making the scene feel more alive instead of static.
What could be better:
The lamp on the left building is a bit bright and slightly pulls attention away from the main subject. Darkening it just a touch would help keep the focus more centred (overall it is not that bad though).
Some of the shadows are pretty deep, especially in the lower corners, which causes detail and texture to disappear a bit. Lifting them slightly could help without ruining the mood.
Emotion & Story
What works well:
The man standing alone in the rain immediately suggests solitude and introspection. It feels quiet, calm, and slightly melancholic.
The scale difference between the man and the massive dome reinforces that classic “small human in a big city” kind of feeling.
What could be better:
We don’t really get to see the man clearly, his face, clothing details, or expression are hidden. That keeps the story very open but also limits emotional connection.
Without knowing what he is wearing (a suit, a coat, a backpack), it is hard to guess for example where he is coming from or going to.
Colour & Tone
What works well:
The contrast between the cold blue tones of the street and buildings and the warmer yellow highlights from the lights works really well. It adds balance, overall visual interest and keeps the scene from feeling flat.
The warm lights on the left and right really adds life and warmth to an otherwise relatively dark and muted palette.
The dome is lit cleanly and looks impressive/grand without feeling overly processed.
What could be better:
Some areas feel slightly inconsistent in brightness → very bright highlights against very dark shadows. A bit more balance could make the transitions smoother.
As mentioned before, the warm tones on the left side (the lamp) pull attention a bit more than necessary.
The blues are dominant (the car lights especially are pretty bright), which works for mood, but a tiny bit more variation could add richness (or just reducing saturation/brightness a bit could have balanced it better).
Balance
The image is overall well balanced in my opinion, mostly thanks to the strong central placement of the man and the dome.
The bright headlights in the middle do help counteract the heavy darkness around the edges.
The left side feels slightly heavier because of the bright lamp and extra visual detail (so more signage, the curb, the fact that the left buildings are literally taller etc.) compared to the right.
Explore The World’s Best Photography Locations

Get access to the world’s best photography location map - explore tens of thousands of amazing photo spots across the globe!
Photographer of the Week
Photographer of the week goes to: Jonathan Varjabedian
You can find him on Instagram as: @framethestreetsdotcom
A few photos of his:


The Rest of this Issue is for Premium Subscribers
