📸 SNAPSHOT - Issue 97
Welcome to a brand new Issue of my Magazine. A truly brilliant one, enjoy the read :)
In partnership with

In this Issue
Brightin Star’s 35mm f/1.4 Lens - A Closer Look
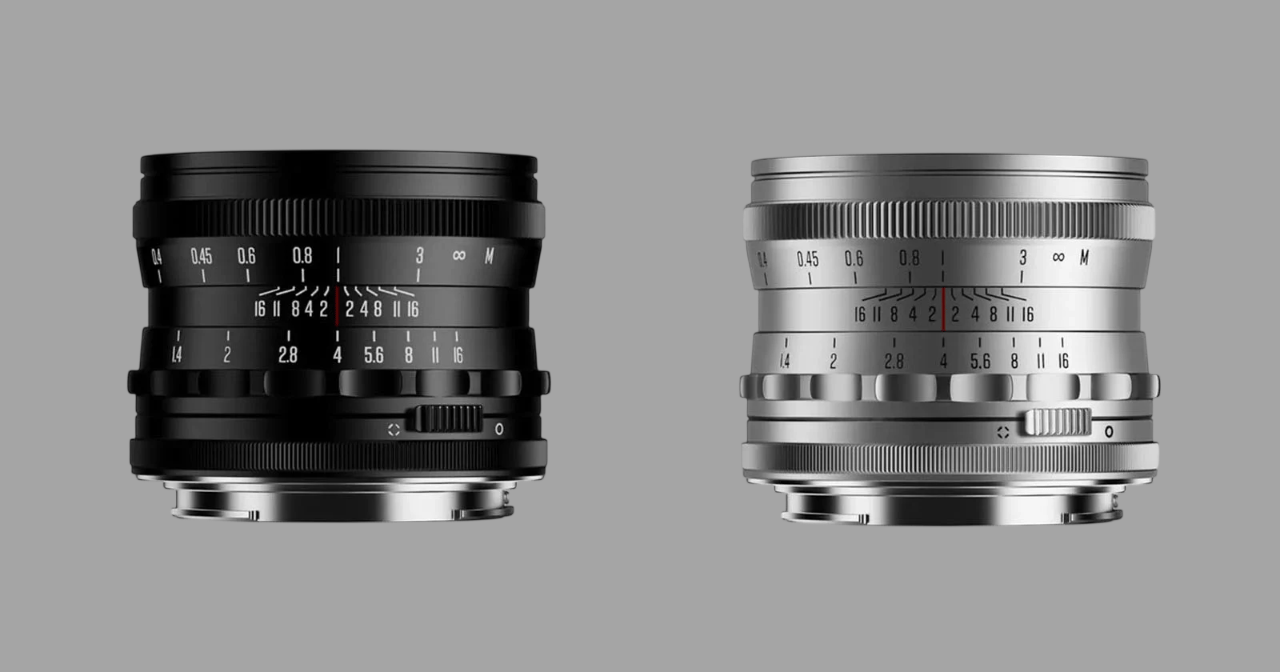
Brightin Star has introduced a new manual-focus prime for full-frame mirrorless systems with the release of the Brightin Star 35mm f/1.4. It is a compact, lightweight lens with a mechanical shooting experience while still being designed for modern mirrorless mounts.
Physically, the lens is relatively small for a full-frame 35mm f/1.4. It weighs 218 grams and measures roughly 42mm in length, giving it a very low-profile presence on the camera. The all-metal construction should give it a solid, reassuring feel despite the low weight, and the retro-inspired design fits nicely with modern mirrorless bodies without looking overly styled.
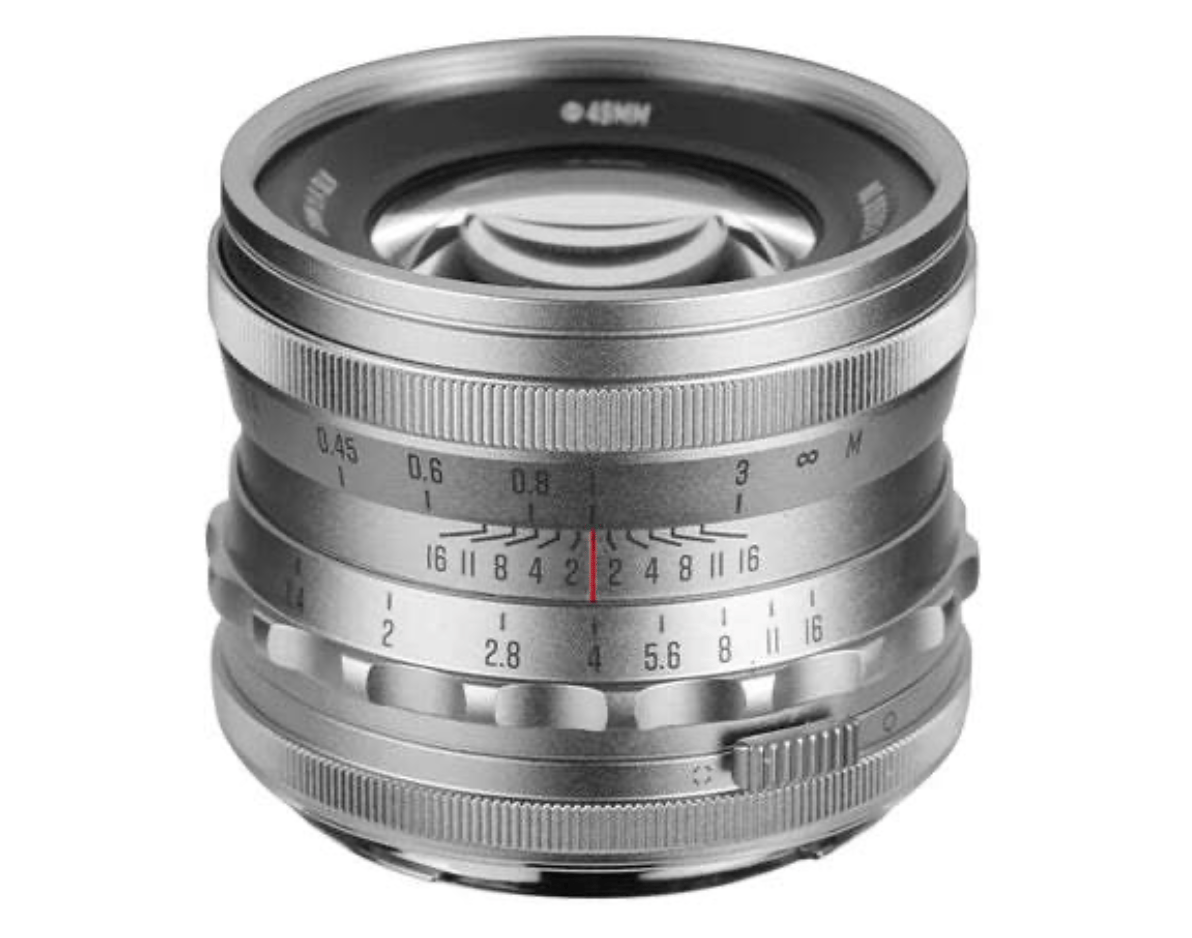
The focus ring is clearly marked, smooth to turn, and offers enough resistance for precise manual focusing. The aperture ring can be clicked or de-clicked, which makes it equally comfortable for stills or video work, and there is a standard 49mm filter thread up front.
Optically, Brightin Star uses a fairly traditional design. The lens is built around a seven-element, six-group layout that includes both high-refraction and low-dispersion elements. The optical formula follows a double Gaussian structure, a classic approach for fast 35mm lenses that prioritises balanced sharpness and natural rendering. Brightin Star claims good center-to-edge sharpness even when shooting wide open at f/1.4.

It has to be noted that this is very much a manual-focus-first lens, and that won’t be for everyone. There is no autofocus motor, no electronics etc. That said, for photographers who enjoy slowing down and being more deliberate, manual focus is part of the appeal. The minimum focusing distance of 0.3 meters allows for fairly close work, and while the five-blade aperture won’t produce perfectly round bokeh stopped down, it fits the lens’s overall character-driven approach. The aperture ranges from f/1.4 to f/16, giving plenty of flexibility across lighting conditions.
In terms of how it fits into the broader market, the Brightin Star 35mm f/1.4 lands in a crowded but interesting space. It goes head-to-head with other manual-focus primes like the Thypoch Simera 35mm f/1.4, which is currently discounted but still positioned as a more premium option with a different rendering philosophy.

There is also the 7Artisans 35mm f/1.4 Mark II, which sits close in price and offers a similarly stripped-down experience, and the Voigtländer Nokton Classic 35mm f/1.4, a well-known option that costs significantly more but brings a long-standing reputation and distinctive character.
Compared to modern autofocus 35mm lenses from first-party manufacturers, the contrast is even sharper of course. Sony’s 35mm f/1.4 GM is a powerhouse but definitely sits in professional pricing territory. Canon’s RF 35mm f/1.4 L VCM plays in the same league, while Nikon takes a slightly different approach with its high-end 35mm f/1.2 S and the more accessible Z 35mm f/1.4. Those lenses deliver great performance and convenience, but they are also heavier, larger, and built around different priorities.

The Brightin Star 35mm f/1.4 is available in black or silver finishes and supports Sony E, Canon RF, Nikon Z, and L-Mount systems, with X-mount compatibility also listed. It launches at $159.99 and is available now.
A few sample shots:


Learn The Art Of Photography

Get full and free access to my Creator University - The World’s Best Online University for Photographers & Creatives: Get access to hundreds of amazing photography courses, learn from professional photographers, connect with students and much more!
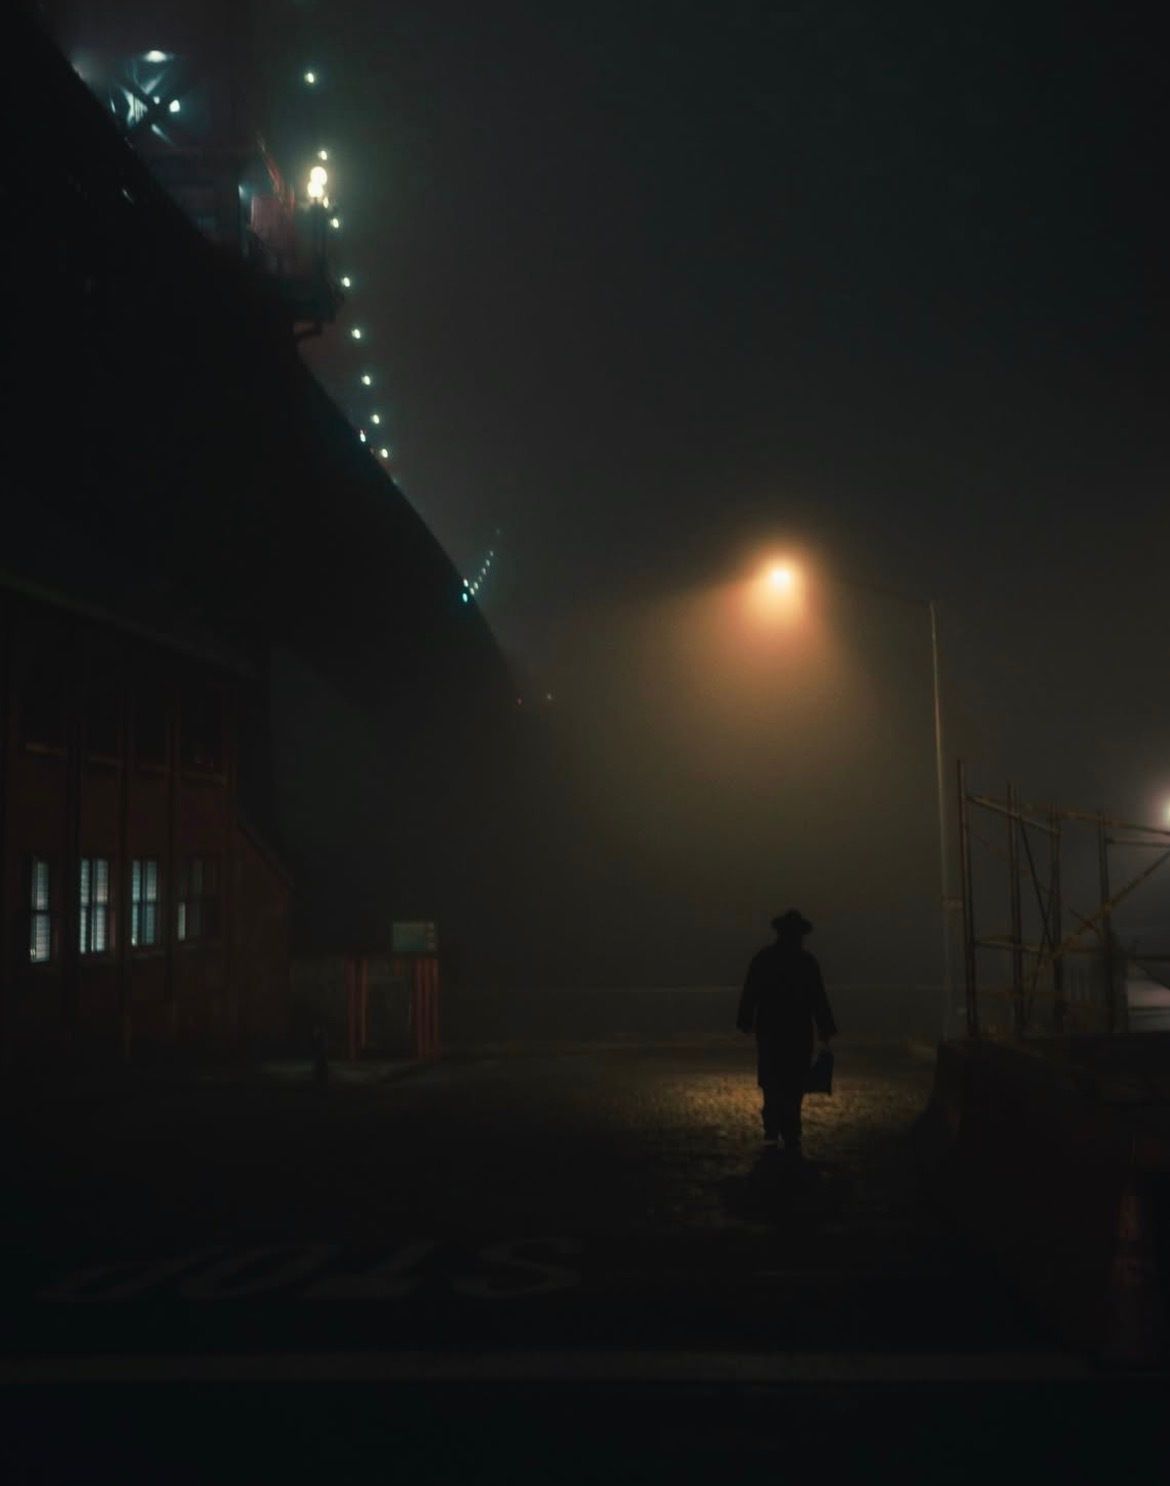
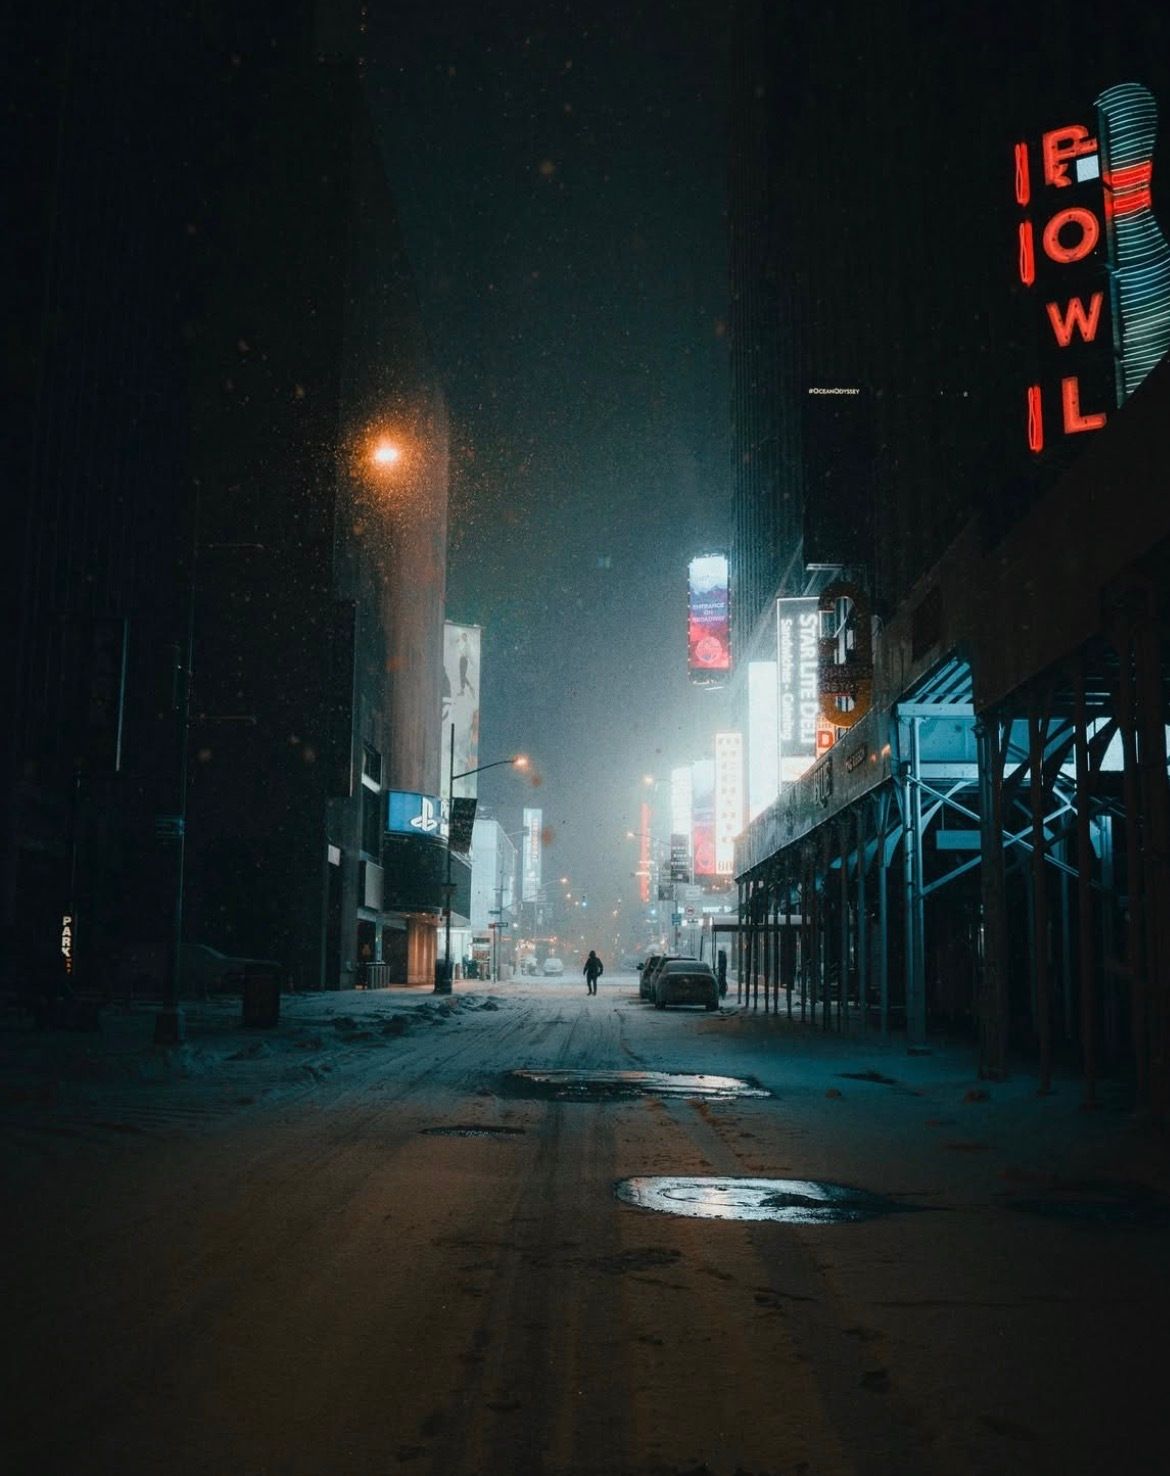
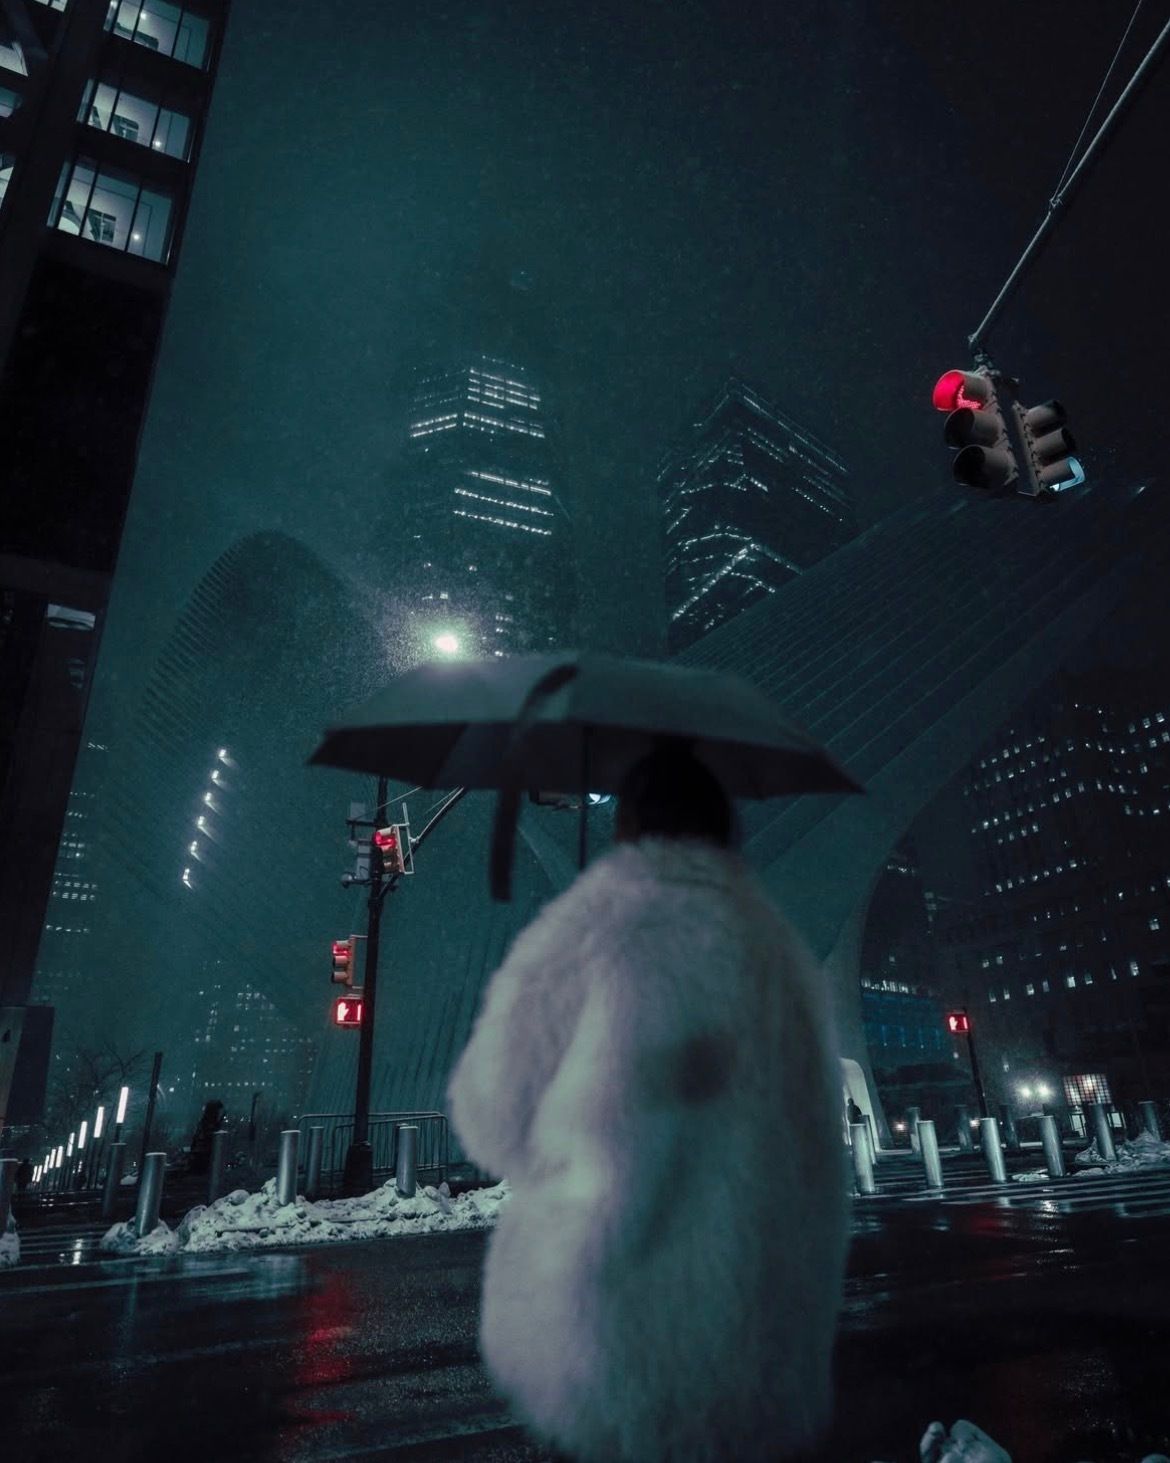
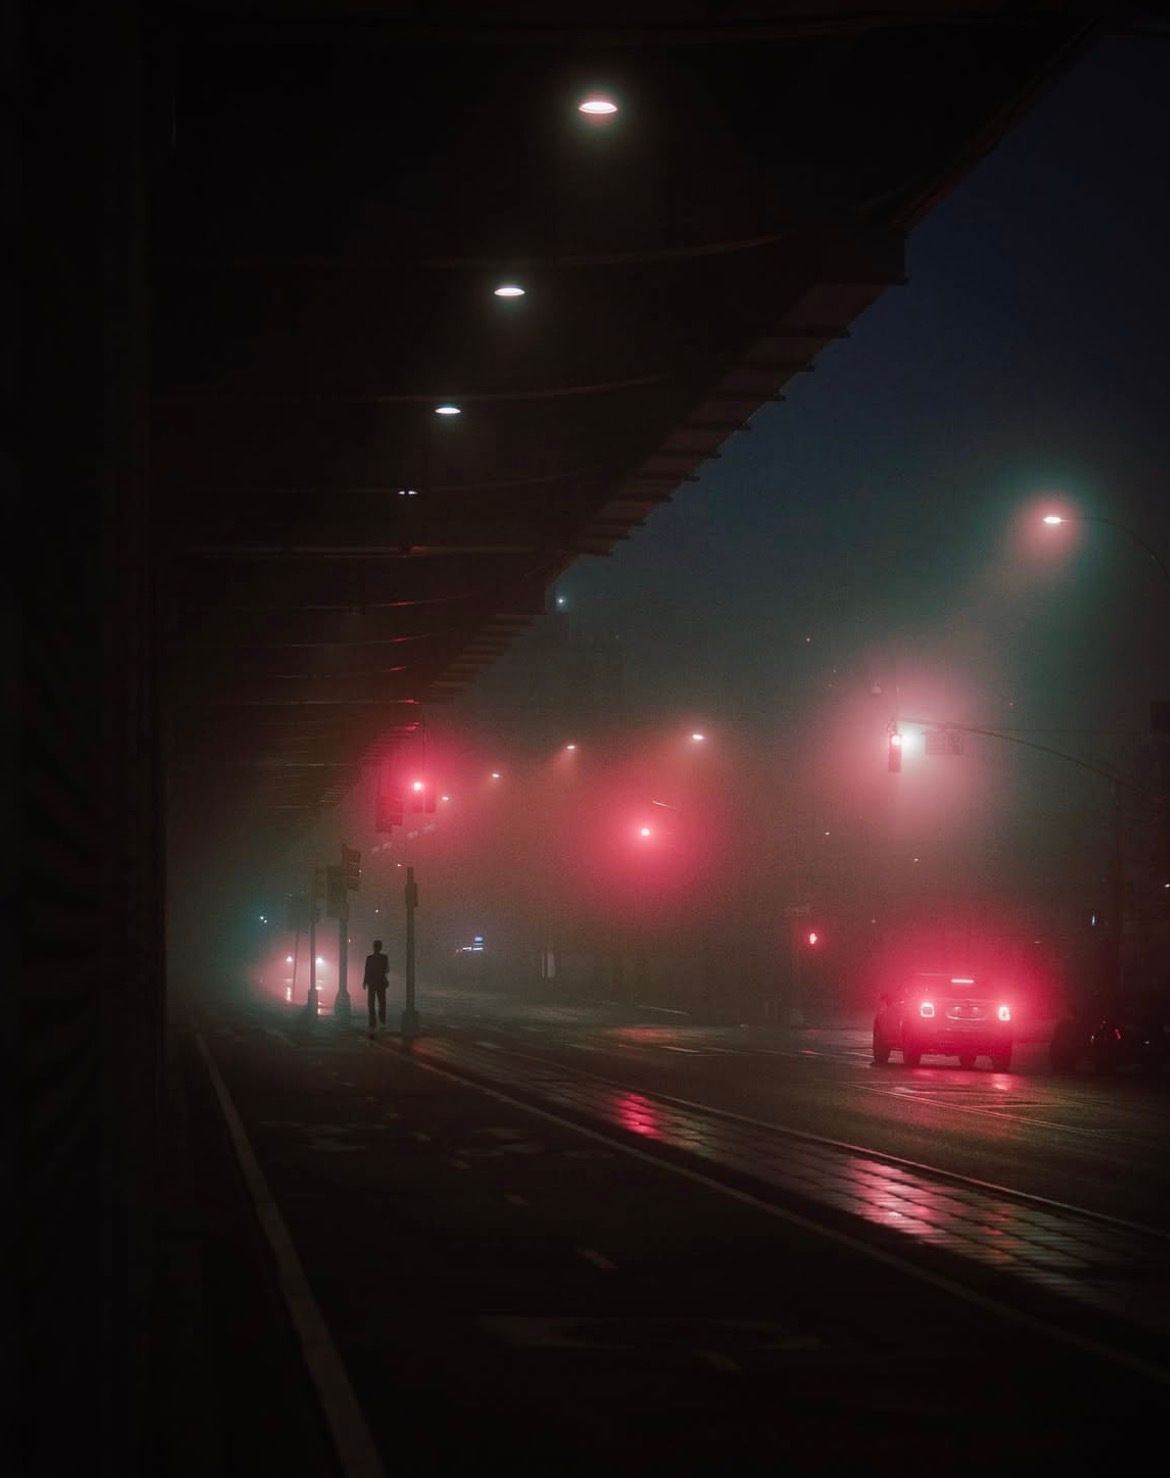
Interview with Riks Le Grand
This week’s Interview with Ricardo, a talented photographer based in NYC. I am truly honoured to have had the opportunity to interview him again, this time with a closer look at his newer work!
You can find him on Instagram as: @framed.by.riks
Enjoy the amazing Interview ;)

Can you introduce yourself to our readers?
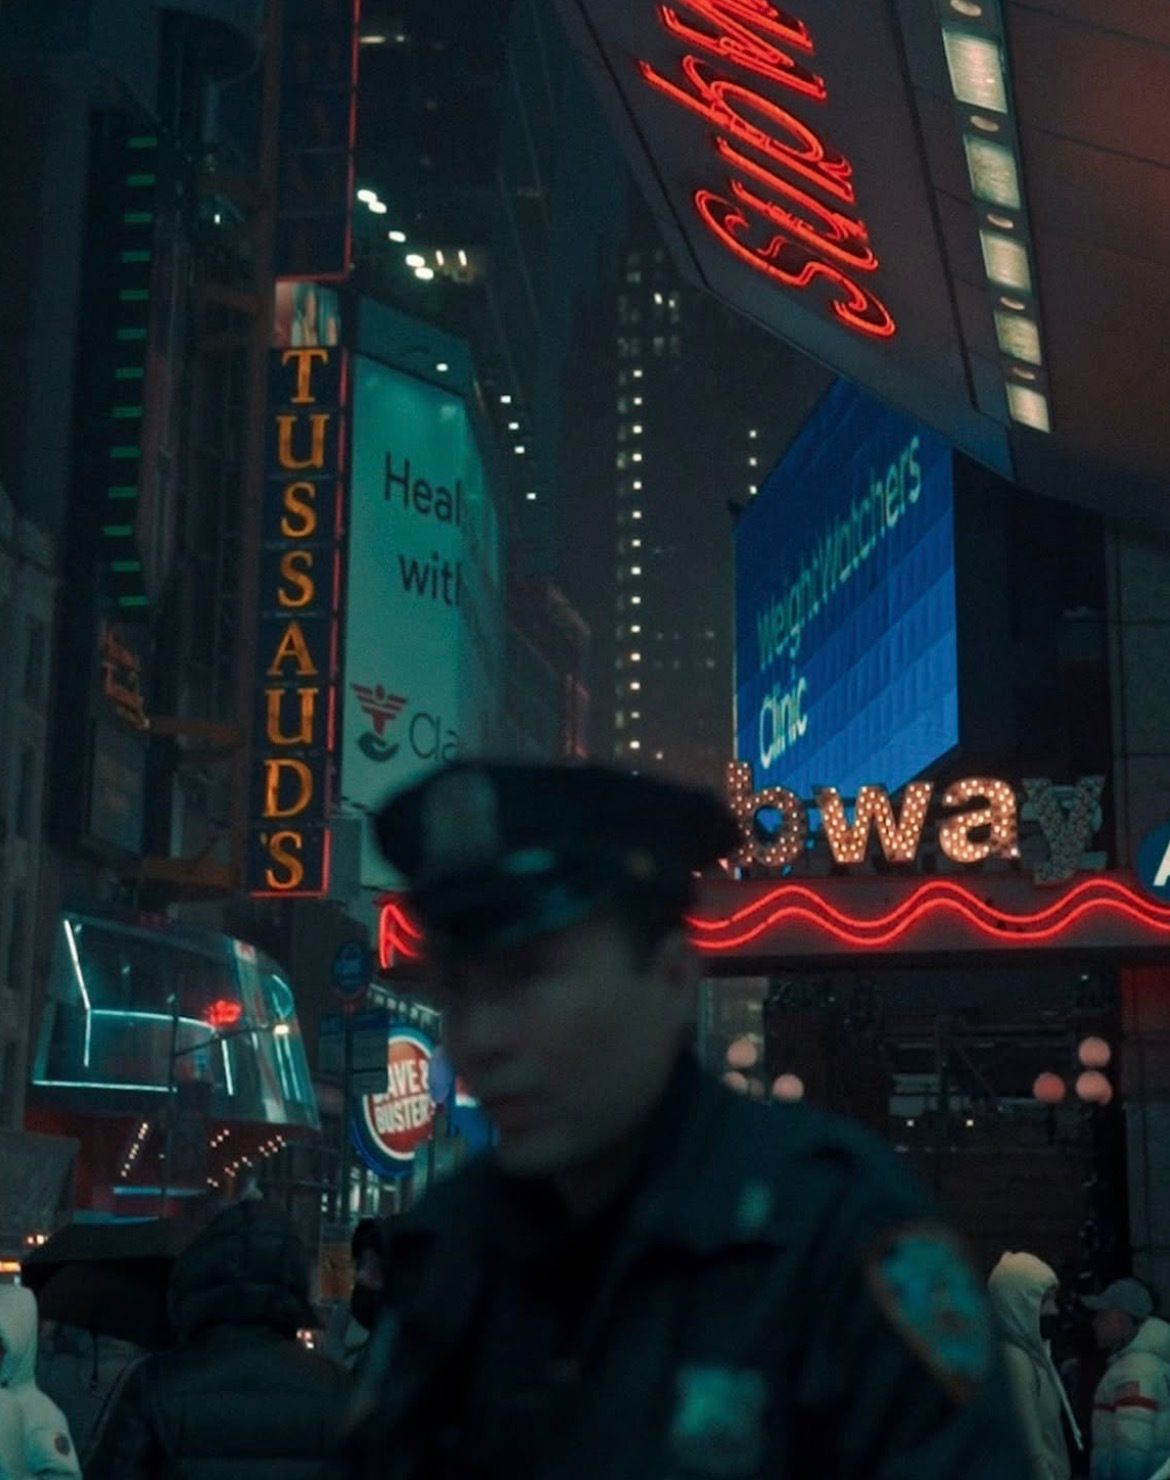
Hello, my name is Ricardo, but most people know me as Riks or by my handle @framed.by.riks. I was born in Mexico City and moved to New York City at a very young age, so chaos and big-city energy have always been part of my everyday life. I think that background naturally shaped the way I see the world and the way I photograph it. Cities never feel overwhelming to me, they feel familiar and alive. New York, in particular, plays a huge role in my work. The streets, the weather, the people, and the constant motion all influence how I shoot and how I edit.
How did your photography journey start?
My photography journey started in a very simple way. Right after high school, I picked up a Nikon D5000 mainly to document family trips, small gatherings with friends and stuff like that. At this point, photography was not something I took seriously. It was more about capturing memories than creating images with intention. That changed around 2016, when I decided to invest in a better camera and really start learning the fundamentals. I began focusing on lighting, composition, and editing, trying to understand why some images worked and others didn’t. At first, I was mostly drawn to landscape and architecture photography. Living in New York City, it’s almost impossible not to photograph iconic buildings like the Empire State, the Chrysler Building, or the Flatiron. This is when, I would say, my real journey began.

How did you find your signature photography and editing style?
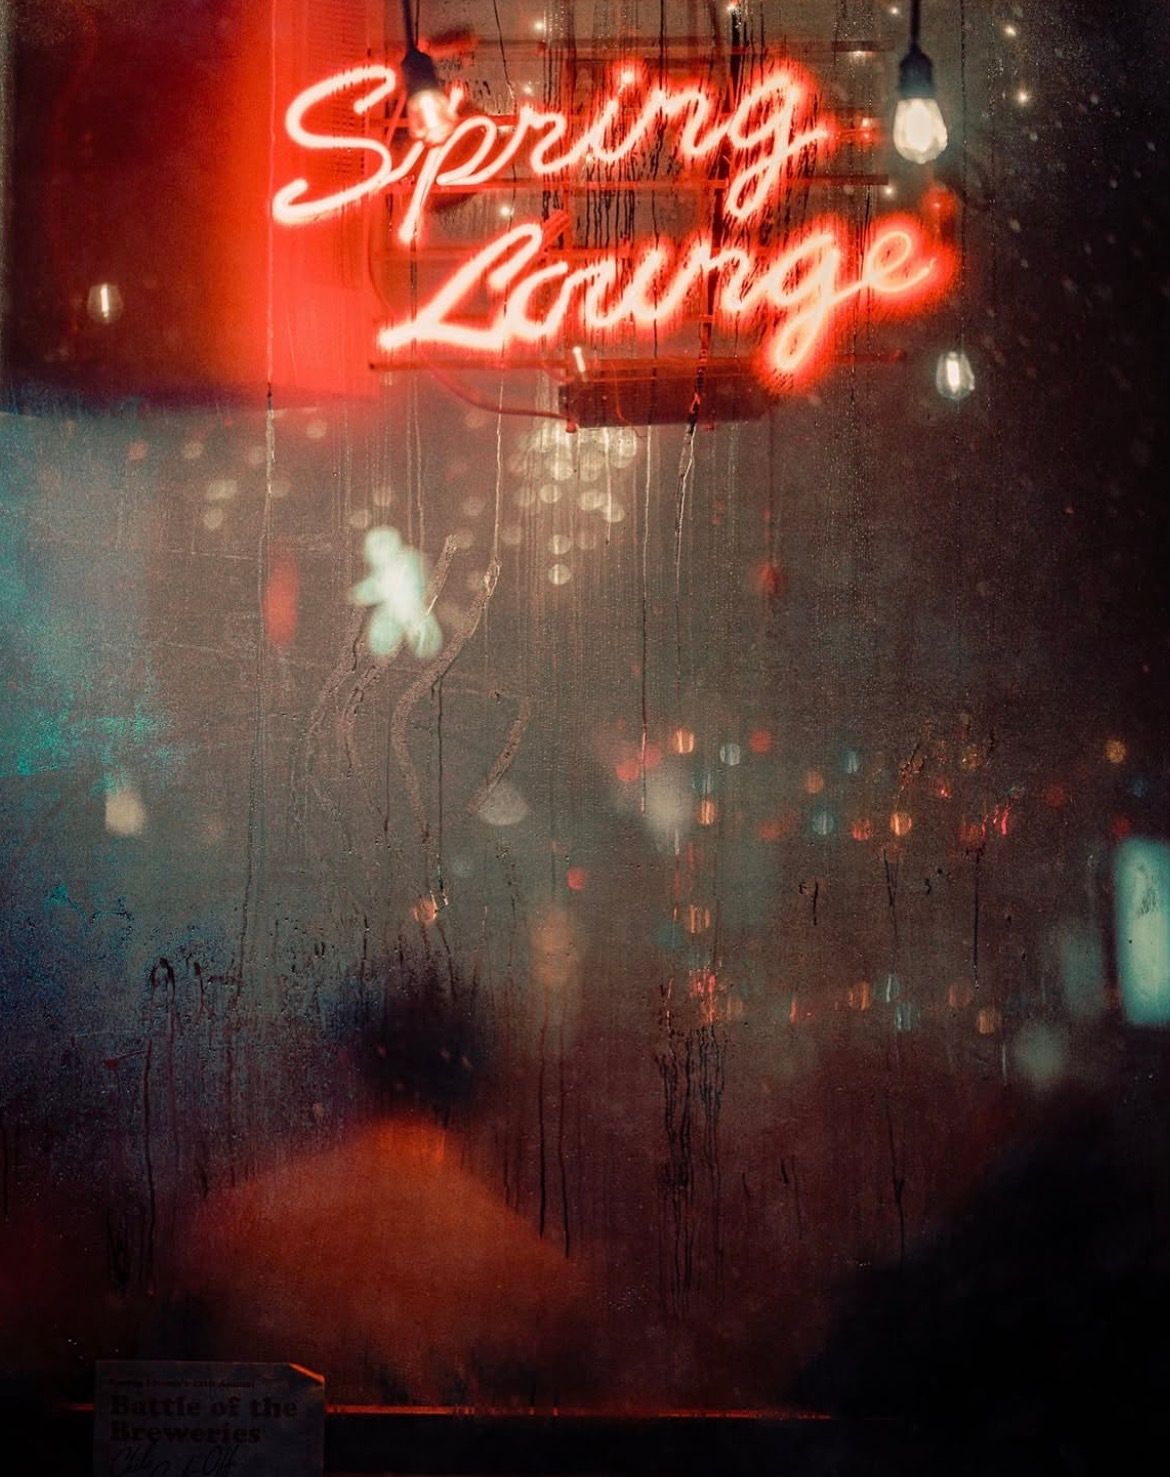
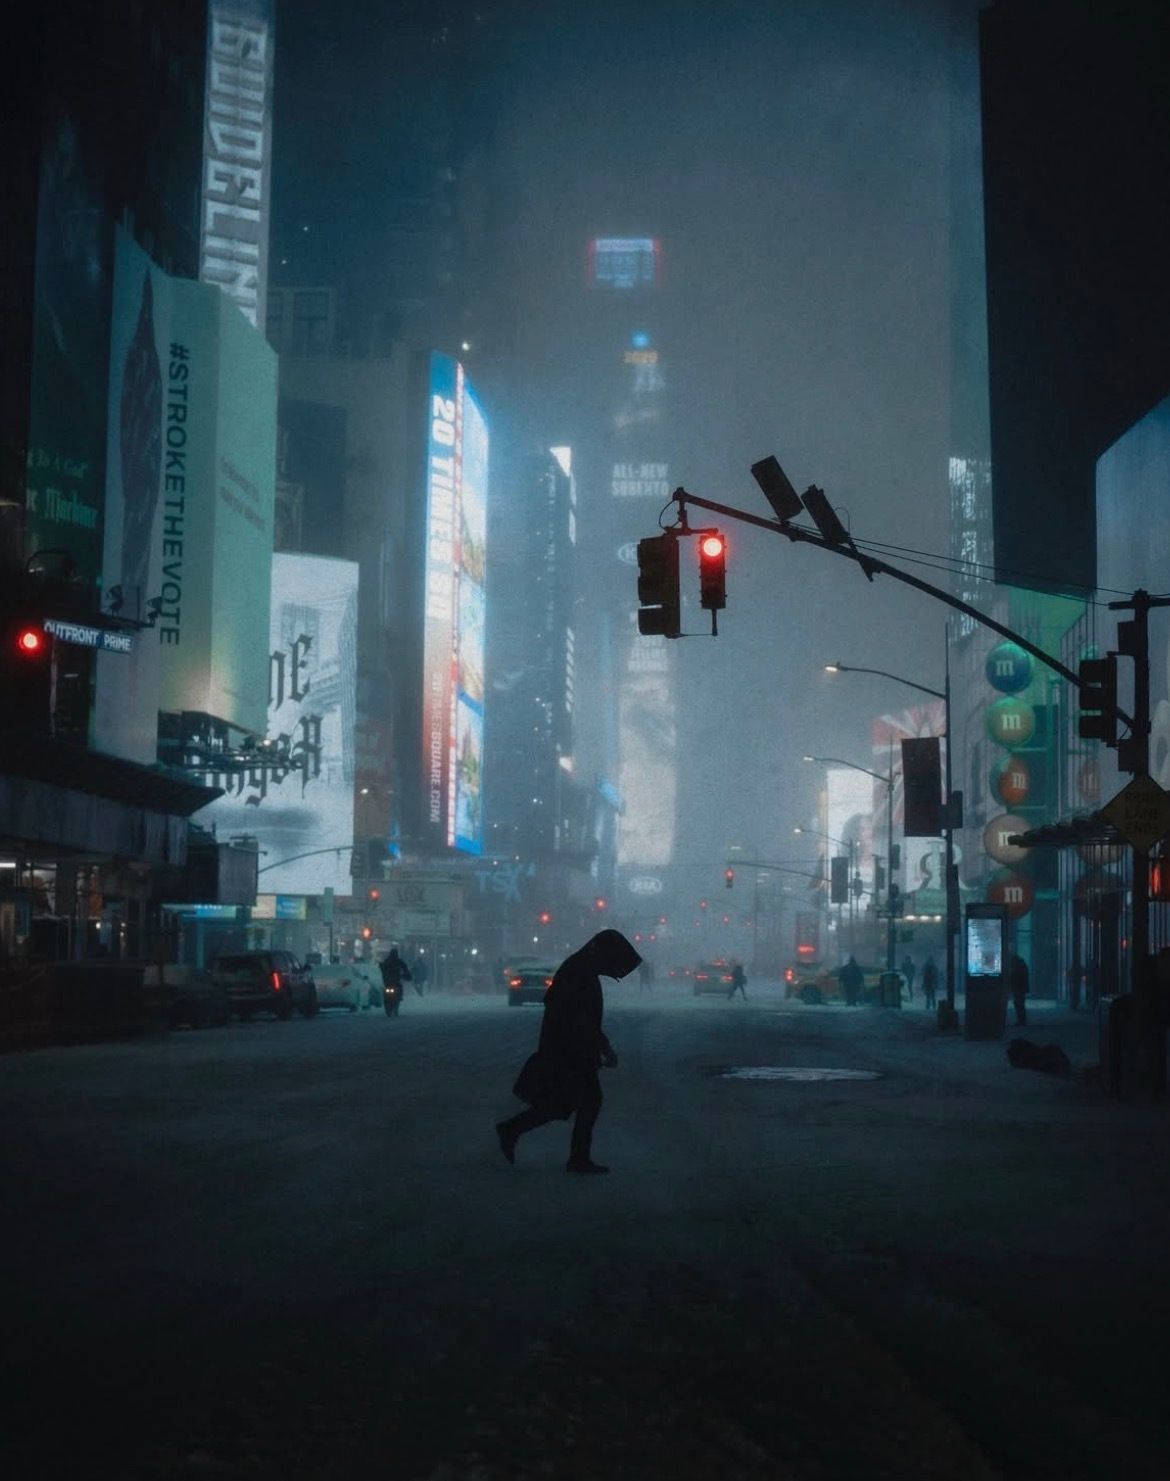
My style developed naturally over time, heavily influenced by cinema. Watching films like Blade Runner 2049, Joker, The Dark Knight, and American Gangster had a huge impact on how I see color and mood. I became drawn to darker, cinematic visuals with strong contrast and atmosphere. I realized that I’m most inspired when the conditions aren’t perfect. Rain, fog, snow, and harsh weather bring out emotions and textures that you don’t get on clear, sunny days. Those conditions make the city feel dramatic and alive. Over time, I started translating that feeling into my editing style as well.
What do you do when you get the feeling that there’s nothing new to shoot?
When I feel like there’s nothing new to shoot, I usually go back and look through my older photos. That process often sparks new ideas. Sometimes I notice a frame that I overlooked before, or I realize that an image could work better with a different crop or a different color grade. Revisiting older work helps me see how much my style has evolved and where I can push it further. It also encourages me to revisit familiar locations but approach them differently. I might go back at a different time of day, during another season, or under different weather conditions. The city doesn’t change much, but the atmosphere always does.
How do you stay inspired and motivated as a photographer, and what do you do when you feel creatively blocked?
Staying inspired is closely tied to the people I surround myself with. I’ve had the chance to shoot alongside photographers I really admire, and being around that level of creativity pushes me to improve. You naturally learn from others, whether it’s composition, patience, or simply how they see a scene. Creative blocks happen to everyone, and when they do, I try not to panic. I remind myself that stepping outside of my comfort zone is part of growth. Sometimes that means trying a different focal length, shooting at a different time, or approaching a familiar spot in a new way. Other times, it means taking a short break and letting ideas come naturally. I’ve learned that forcing creativity usually makes things worse.
What gear do you use?
Not too long ago I switched to the Sony A7 IV, which has become my main camera. Before that, I was shooting with the A7R III, but unfortunately, it got damaged when I travelled to Japan last year. Even though losing a camera is frustrating, it reminded me that gear is just a tool. What really matters is how you use it. The A7 IV gives me great low-light performance, solid dynamic range, and flexibility for both photography and video if I ever need it.

What editing software do you use, and how much time do you spend editing?
I only use Lightroom for editing. I mainly focus on adjusting colors, contrast, and lighting to enhance the mood that was already there. Editing time varies depending on the image, but usually it doesn’t take too long. My goal is always to support the story and atmosphere, not overpower it. If I find myself editing too much, it usually means the photo wasn’t strong enough to begin with.
What keeps you picking up the camera every time?
The fact that no day looks the same. The city always offers another version of itself, and I want to catch those shifts while they happen.
How do you approach shooting in low-light situations, and what equipment do you use to achieve the best results?
Low light is where I feel most comfortable shooting. I usually rely on prime lenses because they allow me to shoot wide open at apertures like f/1.4 or f/1.8. That flexibility is crucial at night. I’m also not afraid of ISO. I’d rather have a bit of grain than miss the shot completely. I typically push ISO to around 1000 or even 2000 if necessary and keep my shutter speed around 1/200. Modern cameras handle noise really well, so there’s no reason to be overly cautious.
What are your favourite shooting conditions?
My favorite shooting conditions are definitely snow, blizzards, foggy nights, and heavy rain. Those conditions transform the city into something completely different. Snow softens everything, fog adds mystery, and rain creates reflections and texture. These elements add layers and depth to an image that you simply can’t replicate in clear weather. I feel like harsh weather brings out the true character of a city. It’s unpredictable and raw, and that’s exactly what I’m drawn to.
Have you got any tips for beginners?
The best advice I can give beginners is to stay consistent. Consistency is everything. Learn your camera, understand light, and study composition. There are endless resources available, from YouTube tutorials to books, so there’s no excuse not to learn. Don’t compare your work too much to what you see on Instagram or in magazines. Everyone’s journey is different, and progress takes time. Your photos won’t look the way you want them to overnight, and that’s completely normal. Be patient with yourself and trust the process. The most important thing is to keep shooting, even when you feel discouraged. Growth comes from repetition, mistakes, and persistence.
How do you define success as a photographer?
Success is staying honest with your work. Not chasing validation, not aimlessly copying trends, and not losing curiosity. If I’m still learning and still excited to shoot, that’s success.
What draws you more to urban photography than other genres?
Urban/street photography feels endless to me. A city is constantly changing, even if you walk the same street every day. As I said before, I like environments where I don’t have control, where I have to react instead of plan. Urban settings force you to stay alert and adapt quickly. There’s also a lot of contrast in cities, wealth next to struggle, calm next to chaos, etc. Cities feel alive. Their energy fits my personality and the way I like to work.
Do you scout locations or shoot instinctively?
I have areas I like and return to often, but I don’t plan shots in advance. I prefer shooting instinctively. When I’m out, I let the environment guide me. If the light hits a building a certain way or weather changes suddenly, that determines where I stop and shoot. Overplanning kills spontaneity for me.

How do you know when a photo is finished?
A photo is finished when it feels balanced emotionally, not when it’s technically perfect. I look at whether the mood I felt while shooting is still present after editing. If the image communicates that feeling without explanation, I stop.
How do you handle fear or hesitation when shooting in public?
Fear was definitely there in the beginning. Pointing a camera in public always feels uncomfortable at first. But hesitation fades with experience. The more you shoot, the more normal it becomes. I don’t draw attention to myself, and I don’t act like I’m doing something wrong. Confidence comes from understanding your intent. I’m not trying to invade anyone’s space or provoke reactions. I’m observing public environments. Most people are too busy to care anyways. When you hesitate, it shows. When you move calmly and intentionally, people barely notice you. Over time, you stop thinking about fear altogether and just do your thing.
What role does storytelling play in your images?
I would say storytelling is present in my work, but it’s subtle. I’m not trying to tell complete narratives with clear beginnings and endings. I’m more interested in suggesting a moment. I want viewers to bring their own interpretation. The story might come from body language, weather, or light rather than action. I leave gaps on purpose. If everything is explained visually, there’s nothing left to discover.
Do you shoot with a final edit in mind?
Sometimes I have a rough idea, especially when I’m shooting at night or in harsh weather. But I stay flexible. Light changes fast, and forcing an edit idea can limit what the image becomes. I prefer adapting in post rather than locking myself into a single vision on the street (you can always change things in post, but you can’t go back to the moment on the street!).
Do you see your style continuing to evolve?
It has to. If it doesn’t, I’m not paying attention. Cities change, and so do I. My work should reflect that.
What’s one thing photography has taught you about yourself?
Patience, discipline, consistency. Progress doesn’t happen fast, and shortcuts don’t last. Photography rewards consistency more than talent.
How do you handle criticism or negative feedback on your work?
I separate useful feedback from noise, not every opinion deserves equal weight. If criticism comes from someone whose work or perspective I respect, I listen carefully. If it’s vague or rooted in personal taste, I let it pass. You can’t please everyone, and trying to do that will dilute your work. Negative feedback used to bother me more, but over time I realized it’s unavoidable. What matters is whether the work feels honest to me.
How important is mood compared to subject in your work?

The rest, 5 more questions of this Interview + an additional exclusive photograph selection, are for Premium subscribers only.
SmallRig’s New Wireless Repeater
SmallRig has introduced the Remote Wildlife Pro Wireless Repeater, a long-range Wi-Fi hub designed to let photographers control cameras placed deep in the field while they stay far out of sight. It is meant for wildlife shooters who regularly deal with the same problem; get too close and you scare the subject off, stay too far away and the photos start to feel distant and not so immersive.
The Remote Wildlife Pro is built specifically around remote camera control. Instead of relying on Bluetooth, which most cameras use for basic wireless connections, SmallRig went with Wi-Fi 6. That choice allows for much longer range and lower latency, with SmallRig claiming control distances of up to 500 meters (around 1,640 feet) in ideal conditions.
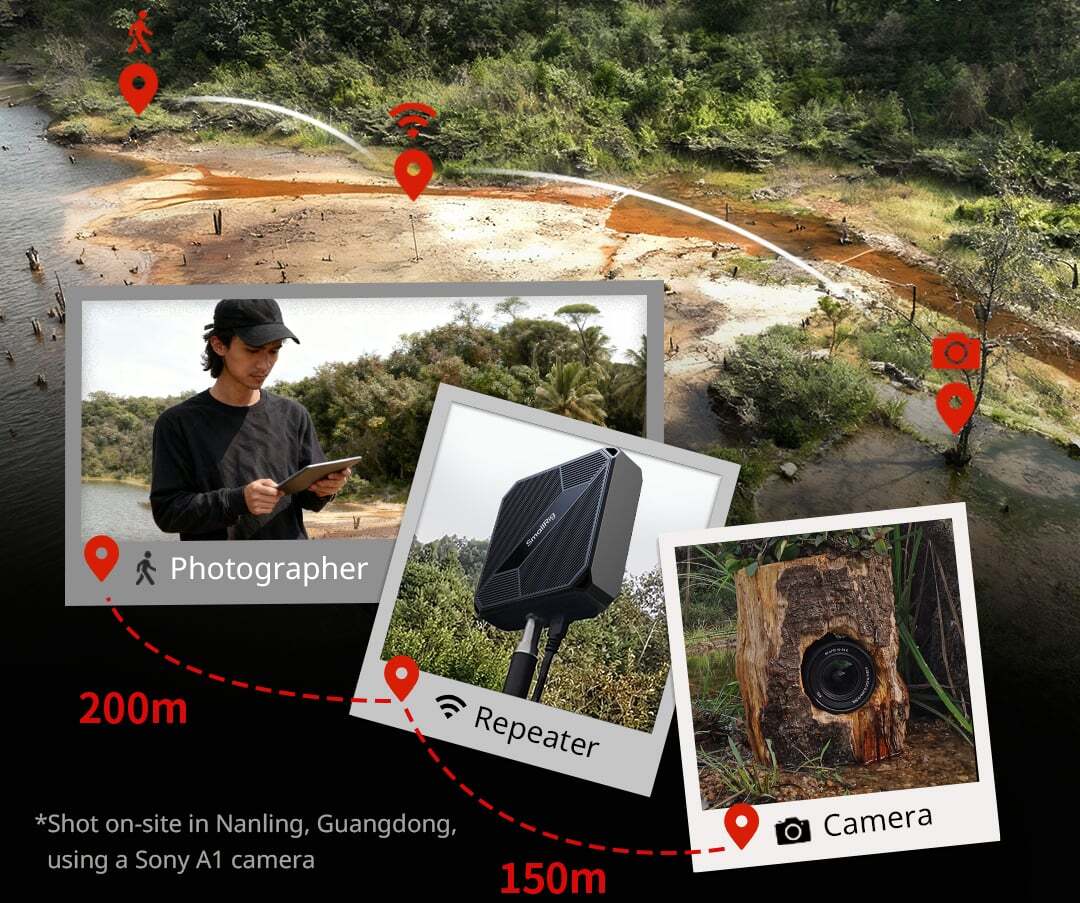
The general idea is pretty simple, you place your camera where the action happens and operate it from a distance. For wildlife photographers using hides, camera traps, or long-term field setups, that can mean less disturbance to animals and more natural behaviour in front of the lens.
Unlike ‘basic’ remote triggers, the Remote Wildlife Pro works through manufacturers’ native camera apps. Once connected, photographers can adjust focus, exposure settings, zoom, and switch between photo and video modes while watching a live feed on a phone or tablet connected to the same network. In practice, it makes the experience feel closer to operating the camera directly, just from much farther away.

Compatibility is broad but not universal. The system supports cameras from Sony, Canon, Nikon, Panasonic, DJI, and Insta360. Fujifilm cameras aren’t supported, which will be a dealbreaker for some people. SmallRig lists latency at around 0.06 seconds, which should be quick enough for moments like birds taking off or animals suddenly entering the shot. The system also supports on-demand recording, so cameras aren’t constantly running, helping preserve battery life and storage during long deployments.
One of the more interesting features is multi-camera control. The repeater can network up to five devices, allowing one-to-many or many-to-many setups. That opens the door to multi-angle coverage, whether that is cameras positioned low to the ground, near water, or mounted higher up for a wider perspective. There are limitations, though. Mirrorless cameras support one-to-many pairing, but action cameras are limited to one-to-one connections, so actual world setups will depend heavily on the specific cameras being used.

Weight wise, the Remote Wildlife Pro comes in at about 218 grams (7.7 ounces). Power consumption is modest at roughly 3 watts, and it can run off standard USB power banks or more robust battery solutions like mini V-lock plates. SmallRig estimates around 10 hours of runtime when paired with a 10,000 mAh power bank.
The body includes seven 1/4″-20 threaded mounting points, making it easy to attach to tripods, clamps, or custom rigs. It is rated to operate in temperatures ranging from -40°F to 140°F (-40°C to 60°C). Somewhat oddly, SmallRig also mentions that it can double as a home Wi-Fi signal booster when it is not being used in the field.

There are some trade-offs. The unit isn’t waterproof, and SmallRig recommends keeping it elevated and free of obstructions for the best signal. For wildlife photographers working in rain, snow, or generally wet environments, that is a real limitation and something that will require careful planning or additional protection.
The SmallRig Remote Wildlife Pro Wireless Repeater is priced at $149.
Get your Photos featured in this Magazine for Free
I am currently testing a new feature, where everyone can get a completely free chance to be featured in my magazine and get seen by thousands of photographers.
Advertisement (Absolutely make sure to check it out) ⬇️
Banish bad ads for good

Your site, your ad choices.
Don’t let intrusive ads ruin the experience for the audience you've worked hard to build.
With Google AdSense, you can ensure only the ads you want appear on your site, making it the strongest and most compelling option.
Don’t just take our word for it. DIY Eule, one of Germany’s largest sewing content creators says, “With Google AdSense, I can customize the placement, amount, and layout of ads on my site.”
Google AdSense gives you full control to customize exactly where you want ads—and where you don't. Use the powerful controls to designate ad-free zones, ensuring a positive user experience.
Photography Tip of the Week


The weekly photography tip is only accessible to Premium Subscribers of The Magazine For Photographers.
Photo Analysis
Welcome to the new part of the Magazine Issue where we take a closer look at a photo and analyse it so that you can learn and better your own photography from it ;)
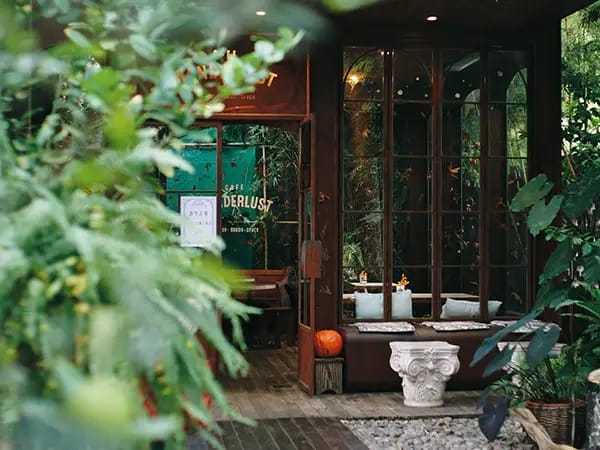
Photo by: @blowithhand
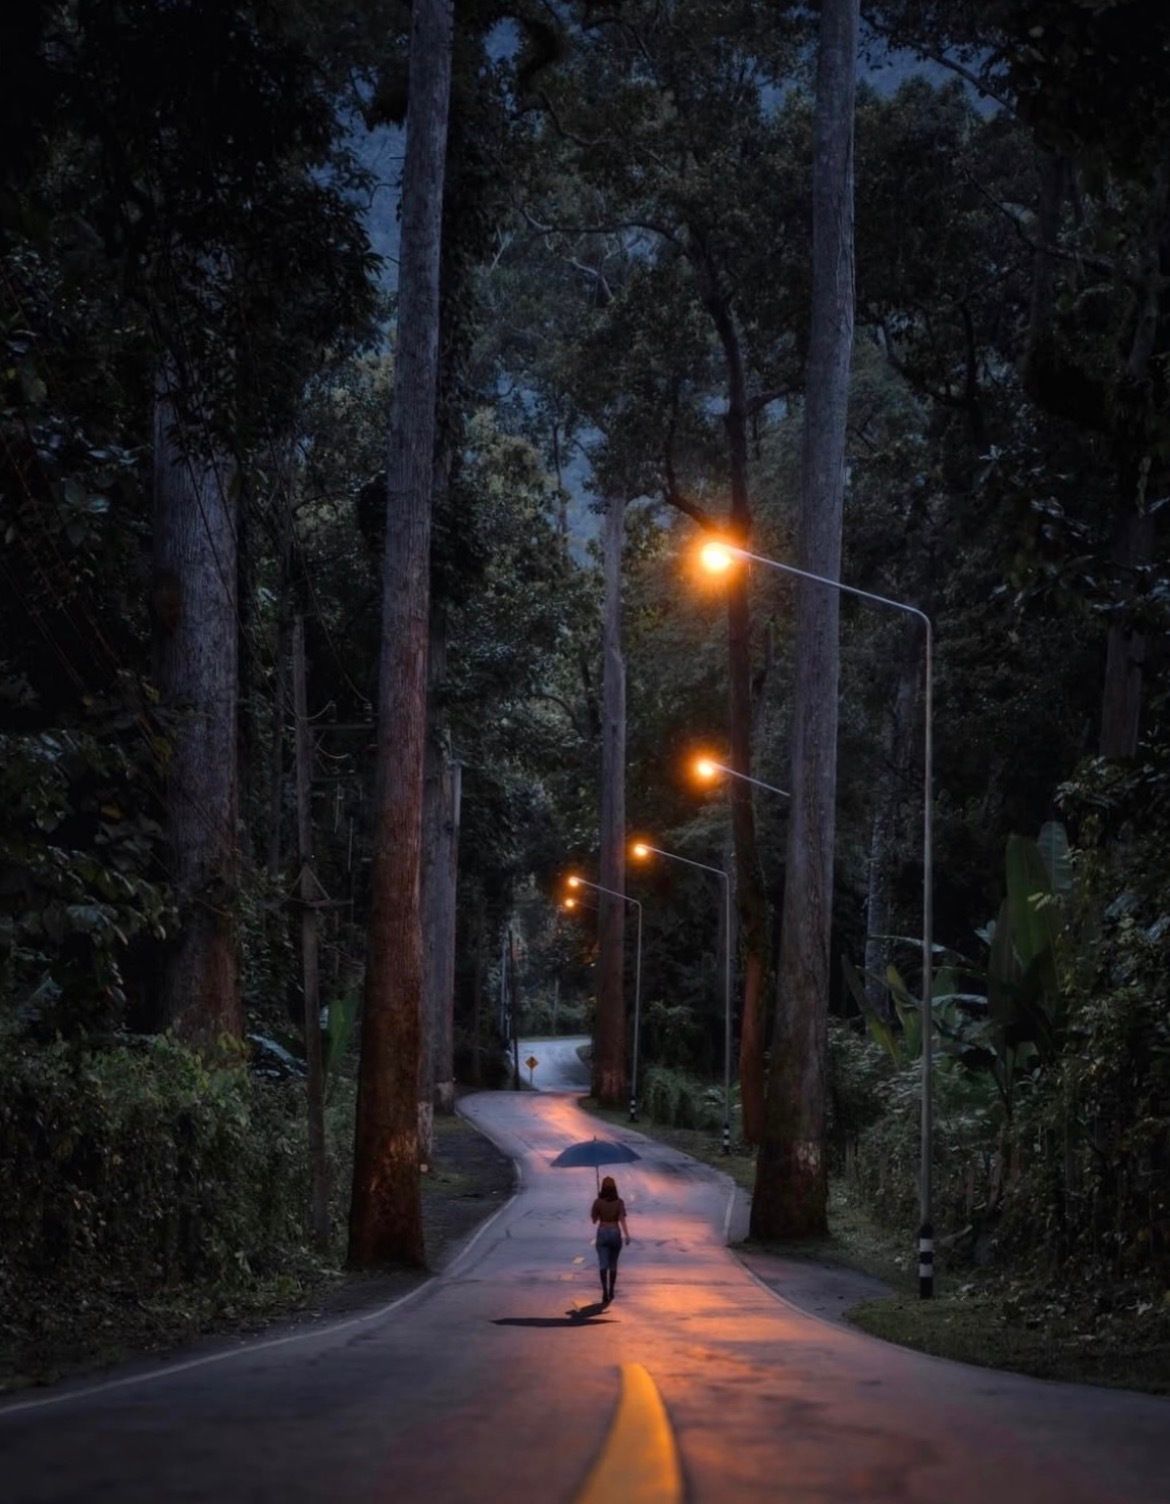
Let’s Analyse this Image:
Composition & Framing
What works well:
The leading lines are really strong. The road itself is the main one, but the first yellow centre line also points directly toward the woman, which works great.
There is a very nice sense of depth too. The foreground road feels heavy and present and it naturally tilts downward which I perfectly because it creates this effect where you as the viewer, almost feel like you are being pulled into the frame, and of course the repeating trees and lights reinforce that tunnel effect creating a cool 3D-look.
The first two large trees act like a natural frame around our subject the woman, which helps anchor her in the scene.
The composition feels very stable and intentional (more on that below), with the woman sitting almost perfectly along the central axis.
What could be better:
The first yellow line could have been exaggerated even more by getting lower to the ground. That perspective would have made the leading lines feel even stronger. (Or also -> turning up the saturation of the yellow lines a bit more in post could have put more attention on them)
The top part of the frame feels a bit heavy with all those trees/tree canopies and general empty space. It does get balance out somewhat thanks to the higher streetlights, but it still dominates a large portion of the image.
There is a small road sign all the way at the end of the road. I personally would have maybe edited that out, just for a cleaner look, normally I am not a big fan of editing stuff like that out, however if it is just a little background detail that does start to really stick out once you notice it (and thus does have the potential to compete for attention), but isn’t actually relevant -> there I think you can do it.
Light & Atmosphere
What works well:
We do get a lot of cool blues from the forest and sky mixed with the warm streetlights. That contrast does set the mood and makes the scene feel pretty calm, quiet, and even slightly mysterious.
The subtle reflections on the wet road are a cool touch too. They add a bit of glow, texture, and also just help pull your eye into the shot
The (pretty strong) warmth of the lights balances out the cold tones, especially against the darker trees and the cooler road surface.
What could be better:
The streetlights might be just a bit too bright. They do steal a bit of attention away from the subject, especially the closer ones, and your eye tends to go up towards them.
Overall the scene is pretty dark but it is appropriate given the setting and time of day, maybe just the road is a bit too bright looking in comparison to the forest and sky so maybe adjusting that a bit in post could balance it out better (let me elaborate -> for me personally it gives off the vibes that if you look just at the road, it looks like if might be afternoon however its still early and there is quite a bit of daylight, BUT when you look at the sky you would think ‘ok it is actually pretty dark already’ -> so this is where my ‘imbalanced’ feeling comes from, but maybe that is just me)
Some darker areas in the forest lose a bit of texture. Lifting those shadows slightly could add detail without ruining the atmosphere.
Colour & Tone
What works well:
The overall colour palette is pleasing → cool forest tones balanced by warm lights + a bit of brown and muted yet rich greens mixed in.
The yellow line on the road adds a subtle but effective colour accent without feeling out of place (it mirrors the yellow/orange in the street lights a bit).
As mentioned before, the warmth of the lights u p top helps counteract the cold blues of the sky and road.
What could be better:
The blue umbrella, that the lady is holding, doesn’t separate very well from the background. It blends into the cool tones quite a bit. Of course you can bring that out in post but I do suspect that this was a staged shoot so just simply bringing a lighter umbrella could have worked as well haha.
Again, the warm lights dominate the highlights slightly. Pulling them back a bit could help keep the focus on our subject.
Some greens in the shadows feel a bit heavy and could be toned down slightly.
Emotion & Story
What works well:
Storytelling aspect here is a bit tricky -> is there even a story? -> is this a staged shot? -> is this a candid moment? -> is it purely for aesthetics/mood/vibes or did the photographer want to actually tell a story?
Let us assume that this is in fact a candid shot, then I would say it feels like someone walking home alone, lost in thought, maybe after a long day stressful day just trying to clear their head. Overall moody and peaceful (yet also with a very slight stench of horror movie vibes).
What could be better:
Strictly storytelling wise we don’t get many clues beyond the general mood. We can’t really tell where she is going or why.
The distance makes it hard to read body language clearly, so the emotional connection stays subtle.
But again -> storytelling might not have been the intent for this picture at all (so I cant actually ‘critique’ it properly).
Explore The World’s Best Photography Locations

Get access to the world’s best photography location map - explore tens of thousands of amazing photo spots across the globe!
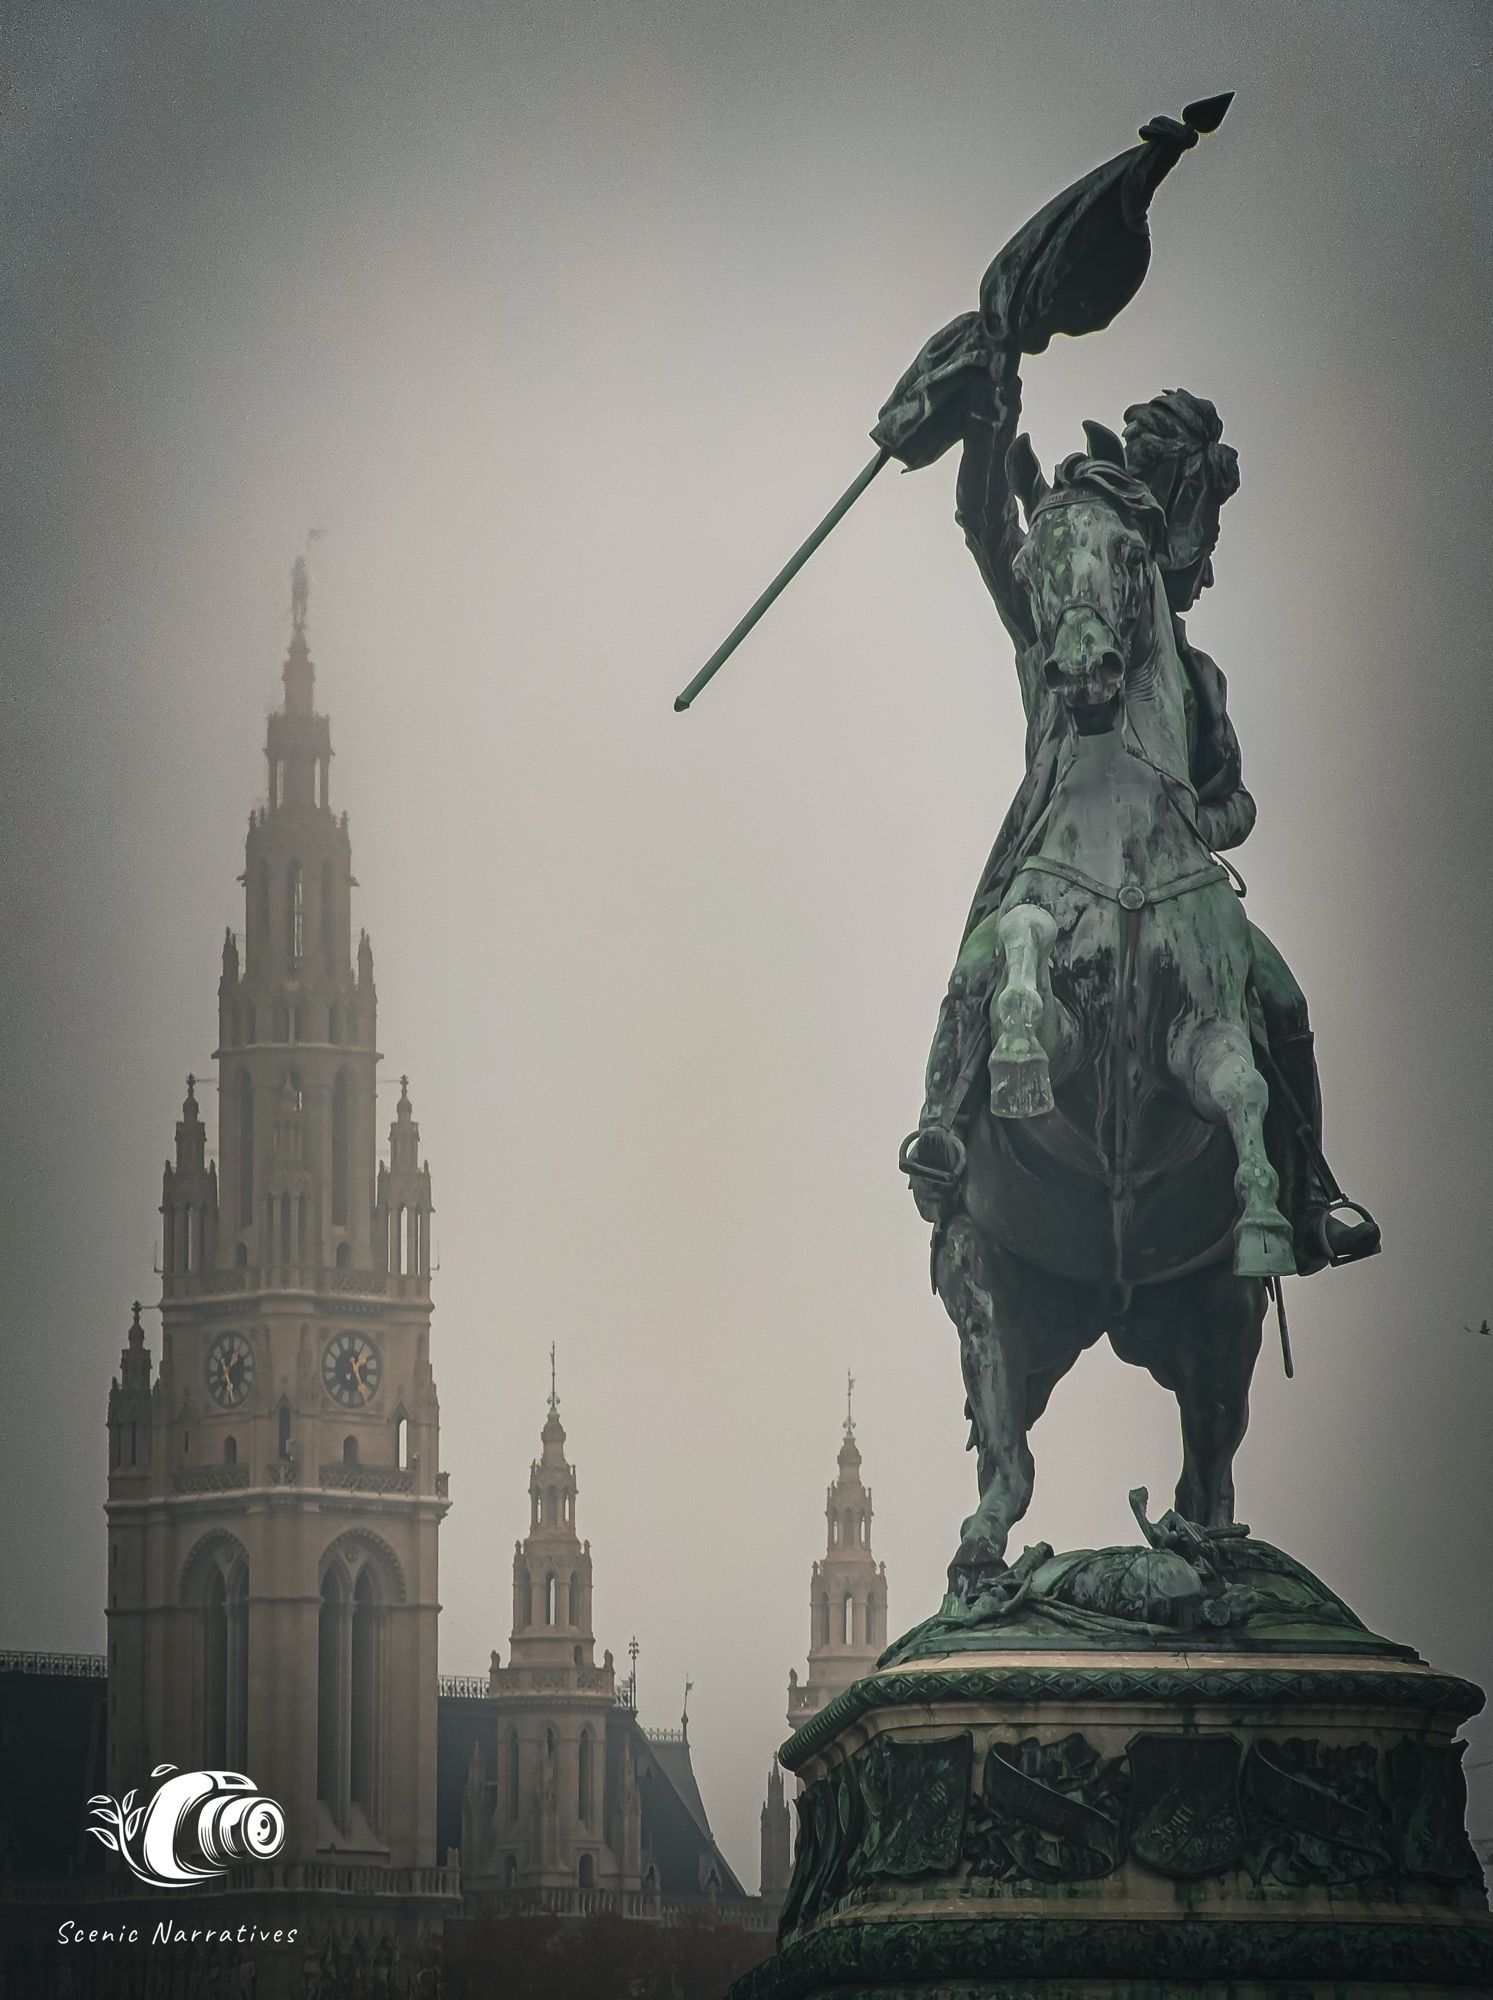
Photographer of the Week
Photographer of the week goes to: Scenic Narratives
You can find him on Instagram as: @scenicnarratives
A few photos of his:


The Rest of this Issue is for Premium Subscribers
