📸 The Magazine For Photographers - Bite Size
Read the Latest Photography News and Updates in the Creative Industry in 3-4 minutes or less ;)
In partnership with

Important note: All photography articles are NOT sponsored
The Latest News:
TTArtisan’s New Tilt-Shift Lens
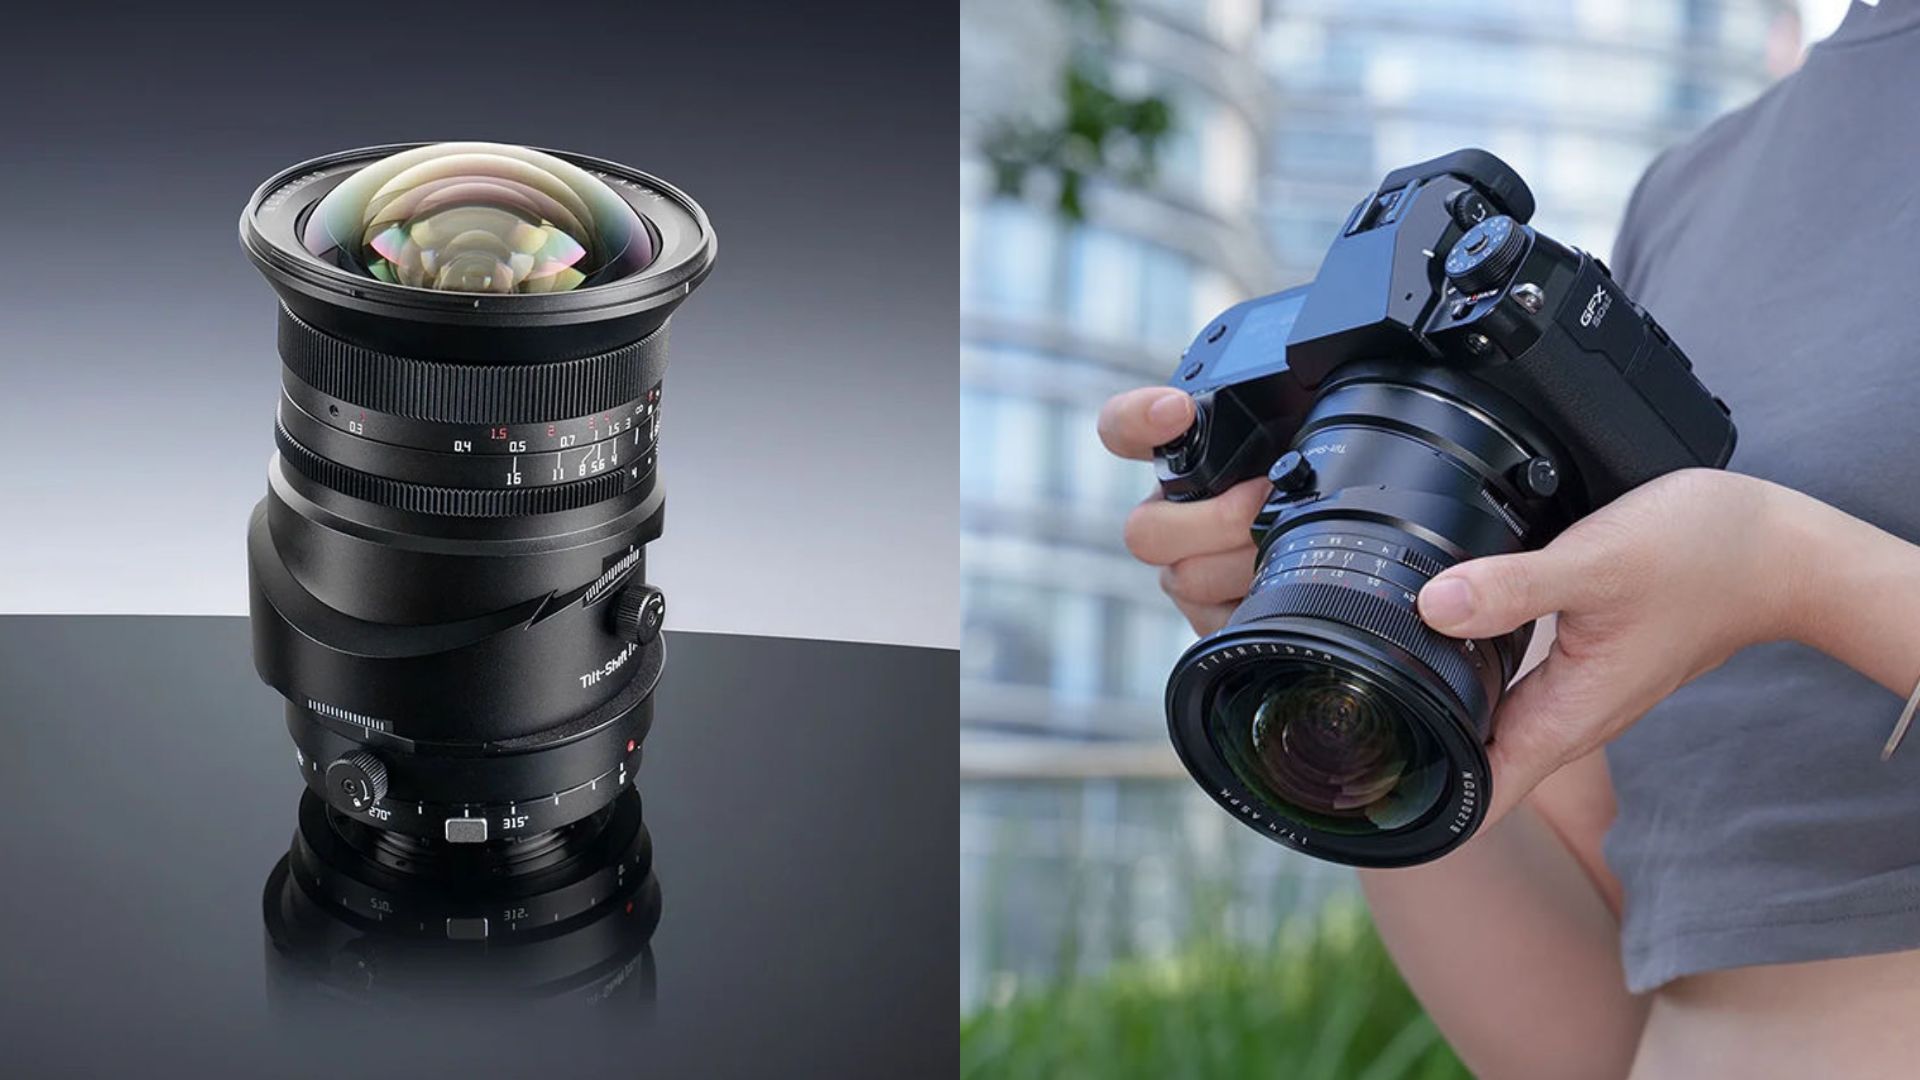
credits: TTArtisan
TTArtisan has expanded its tilt-shift lineup with the 17mm f/4 tilt-shift lens, which is now also available for Nikon Z, Canon RF, and L-mount cameras. The lens had previously been released for Sony E-mount and Fujifilm GFX systems, and this update simply brings the same design to a wider range of mirrorless mounts. With its ultra-wide 17mm focal length and tilt-shift functionality, it is meant for areas like architecture, interiors, and landscape photography where controlling perspective and focus plane is often important.
From a technical standpoint, the lens uses an optical design with 17 elements arranged in 11 groups, including two large aspherical elements intended to help control distortion, dispersion, and chromatic aberration. It features a maximum aperture of f/4, stopping down to f/16, along with a 10-blade diaphragm. The tilt mechanism allows ±8° of tilt, while the shift function offers ±8mm of movement for correcting perspective distortion. The lens can also rotate a full 360° with 15-degree click stops, which makes it easier to adjust the tilt and shift orientation depending on the shot. The angle of view is about 104°, and the minimum focusing distance is 0.3 meters.
The lens is manual focus only and built with an all-metal construction and a clicked aperture ring. It weighs roughly 1031 to 1060 grams depending on the mount, which is fairly typical for a tilt-shift lens of this type. Another interesting detail is the large 64mm image circle, which is much larger than what a standard full-frame lens requires and provides the extra coverage needed for shift movements. The TTArtisan 17mm f/4 tilt-shift lens is available for Sony E, Fujifilm GFX, Nikon Z, Canon RF, and L mounts, with a launch price of $550.
You can see full details on TTArtisan’s website here
The Latest Canon Rumours
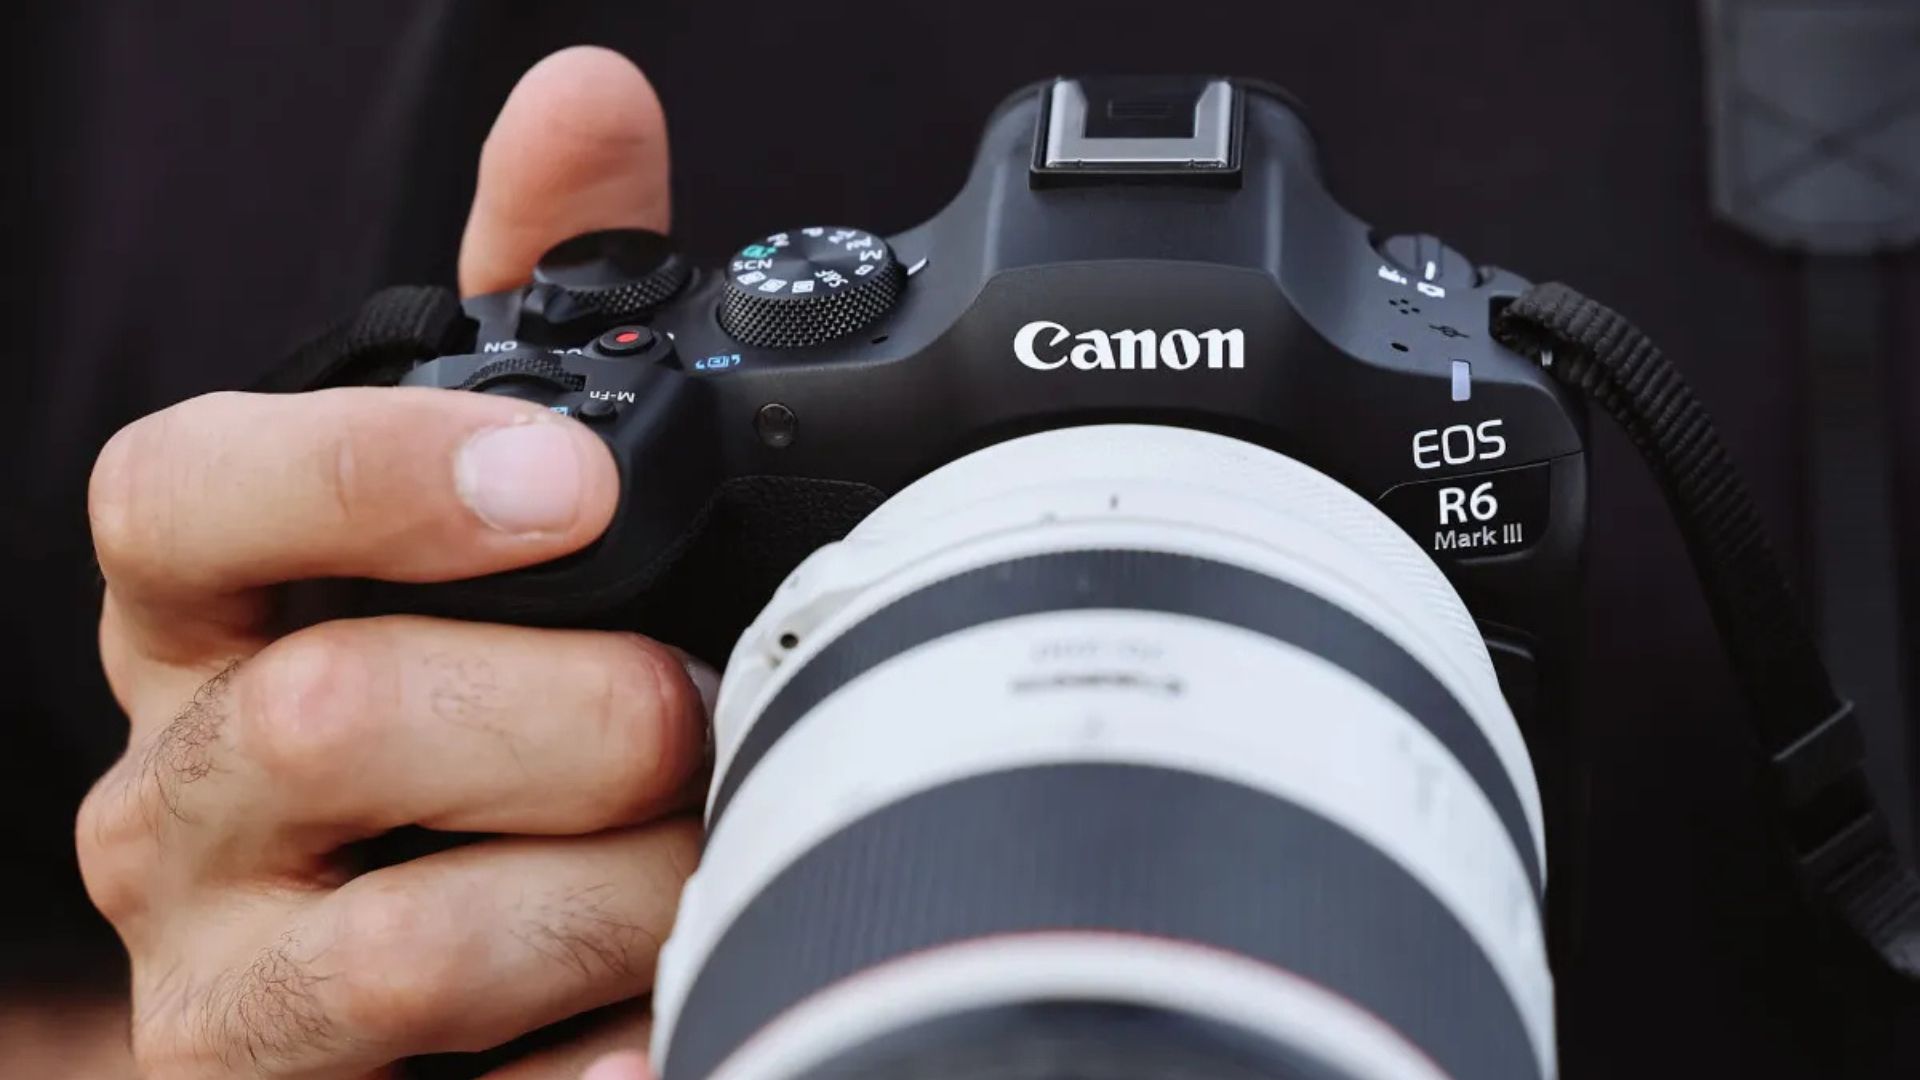
credits: Canon
A new rumour is causing excitement in the Canon community, suggesting the company could be working on a zoom lens with a constant f/1.4 aperture, possibly arriving as early as late 2026. The rumour site CanonRumors reports that there is “pretty good evidence” that such a lens exists. At this point, though, the details are still extremely limited. There is no confirmed focal length range yet, and there is also no information about pricing. The speculation appears to be connected to a recently surfaced Canon patent that outlines several optical designs for extremely fast f/1.4 zooms.
The lens is believed to be part of Canon’s high-end L-series lineup, which would strongly suggest a full-frame design. Canon has never released an L-series lens for APS-C cameras (neither in the EF-S system nor the newer RF-S mount) so a full-frame RF lens seems far more likely. That said, the patent itself includes designs intended for both full-frame and APS-C sensors. There has been some speculation that a lens like this could appear alongside the upcoming EOS R7 Mark II, although there is currently no indication of an RF-S version, making an APS-C model possible but unlikely for now.
If Canon actually releases a constant f/1.4 zoom, it would go well beyond anything currently available. Sony recently raised the bar with lenses like the FE 28–70mm f/2 GM and FE 50–150mm f/2 GM, while Canon itself made waves with the RF 28–70mm f/2L USM when the EOS R system launched. An f/1.4 zoom would push things even further. Of course, a lens like that would almost certainly be large, heavy, and extremely expensive. Some speculation online has put the price anywhere from $5,000 to well over $20,000, although a shorter zoom range would probably be necessary to keep the size and complexity somewhat manageable.
Download The World’s Best Lightroom Presets
Something You Have To Check Out
AI is something that most photographers/creatives see critically, and for absolutely good reason. HOWEVER the fact at the end of the day is that there sadly is no stopping AI, so the best thing you can do is learn how to use AI to your own advantage, whether that be with helping you with daily tasks, writing, editing, your day-job etc.
This is where the Chat-GPT Guide from Superhuman AI comes in. It will teach you how to use AI to your advantage, increase your work efficiency (something every creative needs) and more!
Definitely check it out, highly recommended (+ it is completely free) ⬇️
1,000+ Proven ChatGPT Prompts That Help You Work 10X Faster

ChatGPT is insanely powerful.
But most people waste 90% of its potential by using it like Google.
These 1,000+ proven ChatGPT prompts fix that and help you work 10X faster.
Sign up for Superhuman AI and get:
1,000+ ready-to-use prompts to solve problems in minutes instead of hours—tested & used by 1M+ professionals
Superhuman AI newsletter (3 min daily) so you keep learning new AI tools & tutorials to stay ahead in your career—the prompts are just the beginning
Weekly Photo Technique Exploration
Welcome to a new section of the magazine where every week we will explore a new photography technique from across various photography genres.
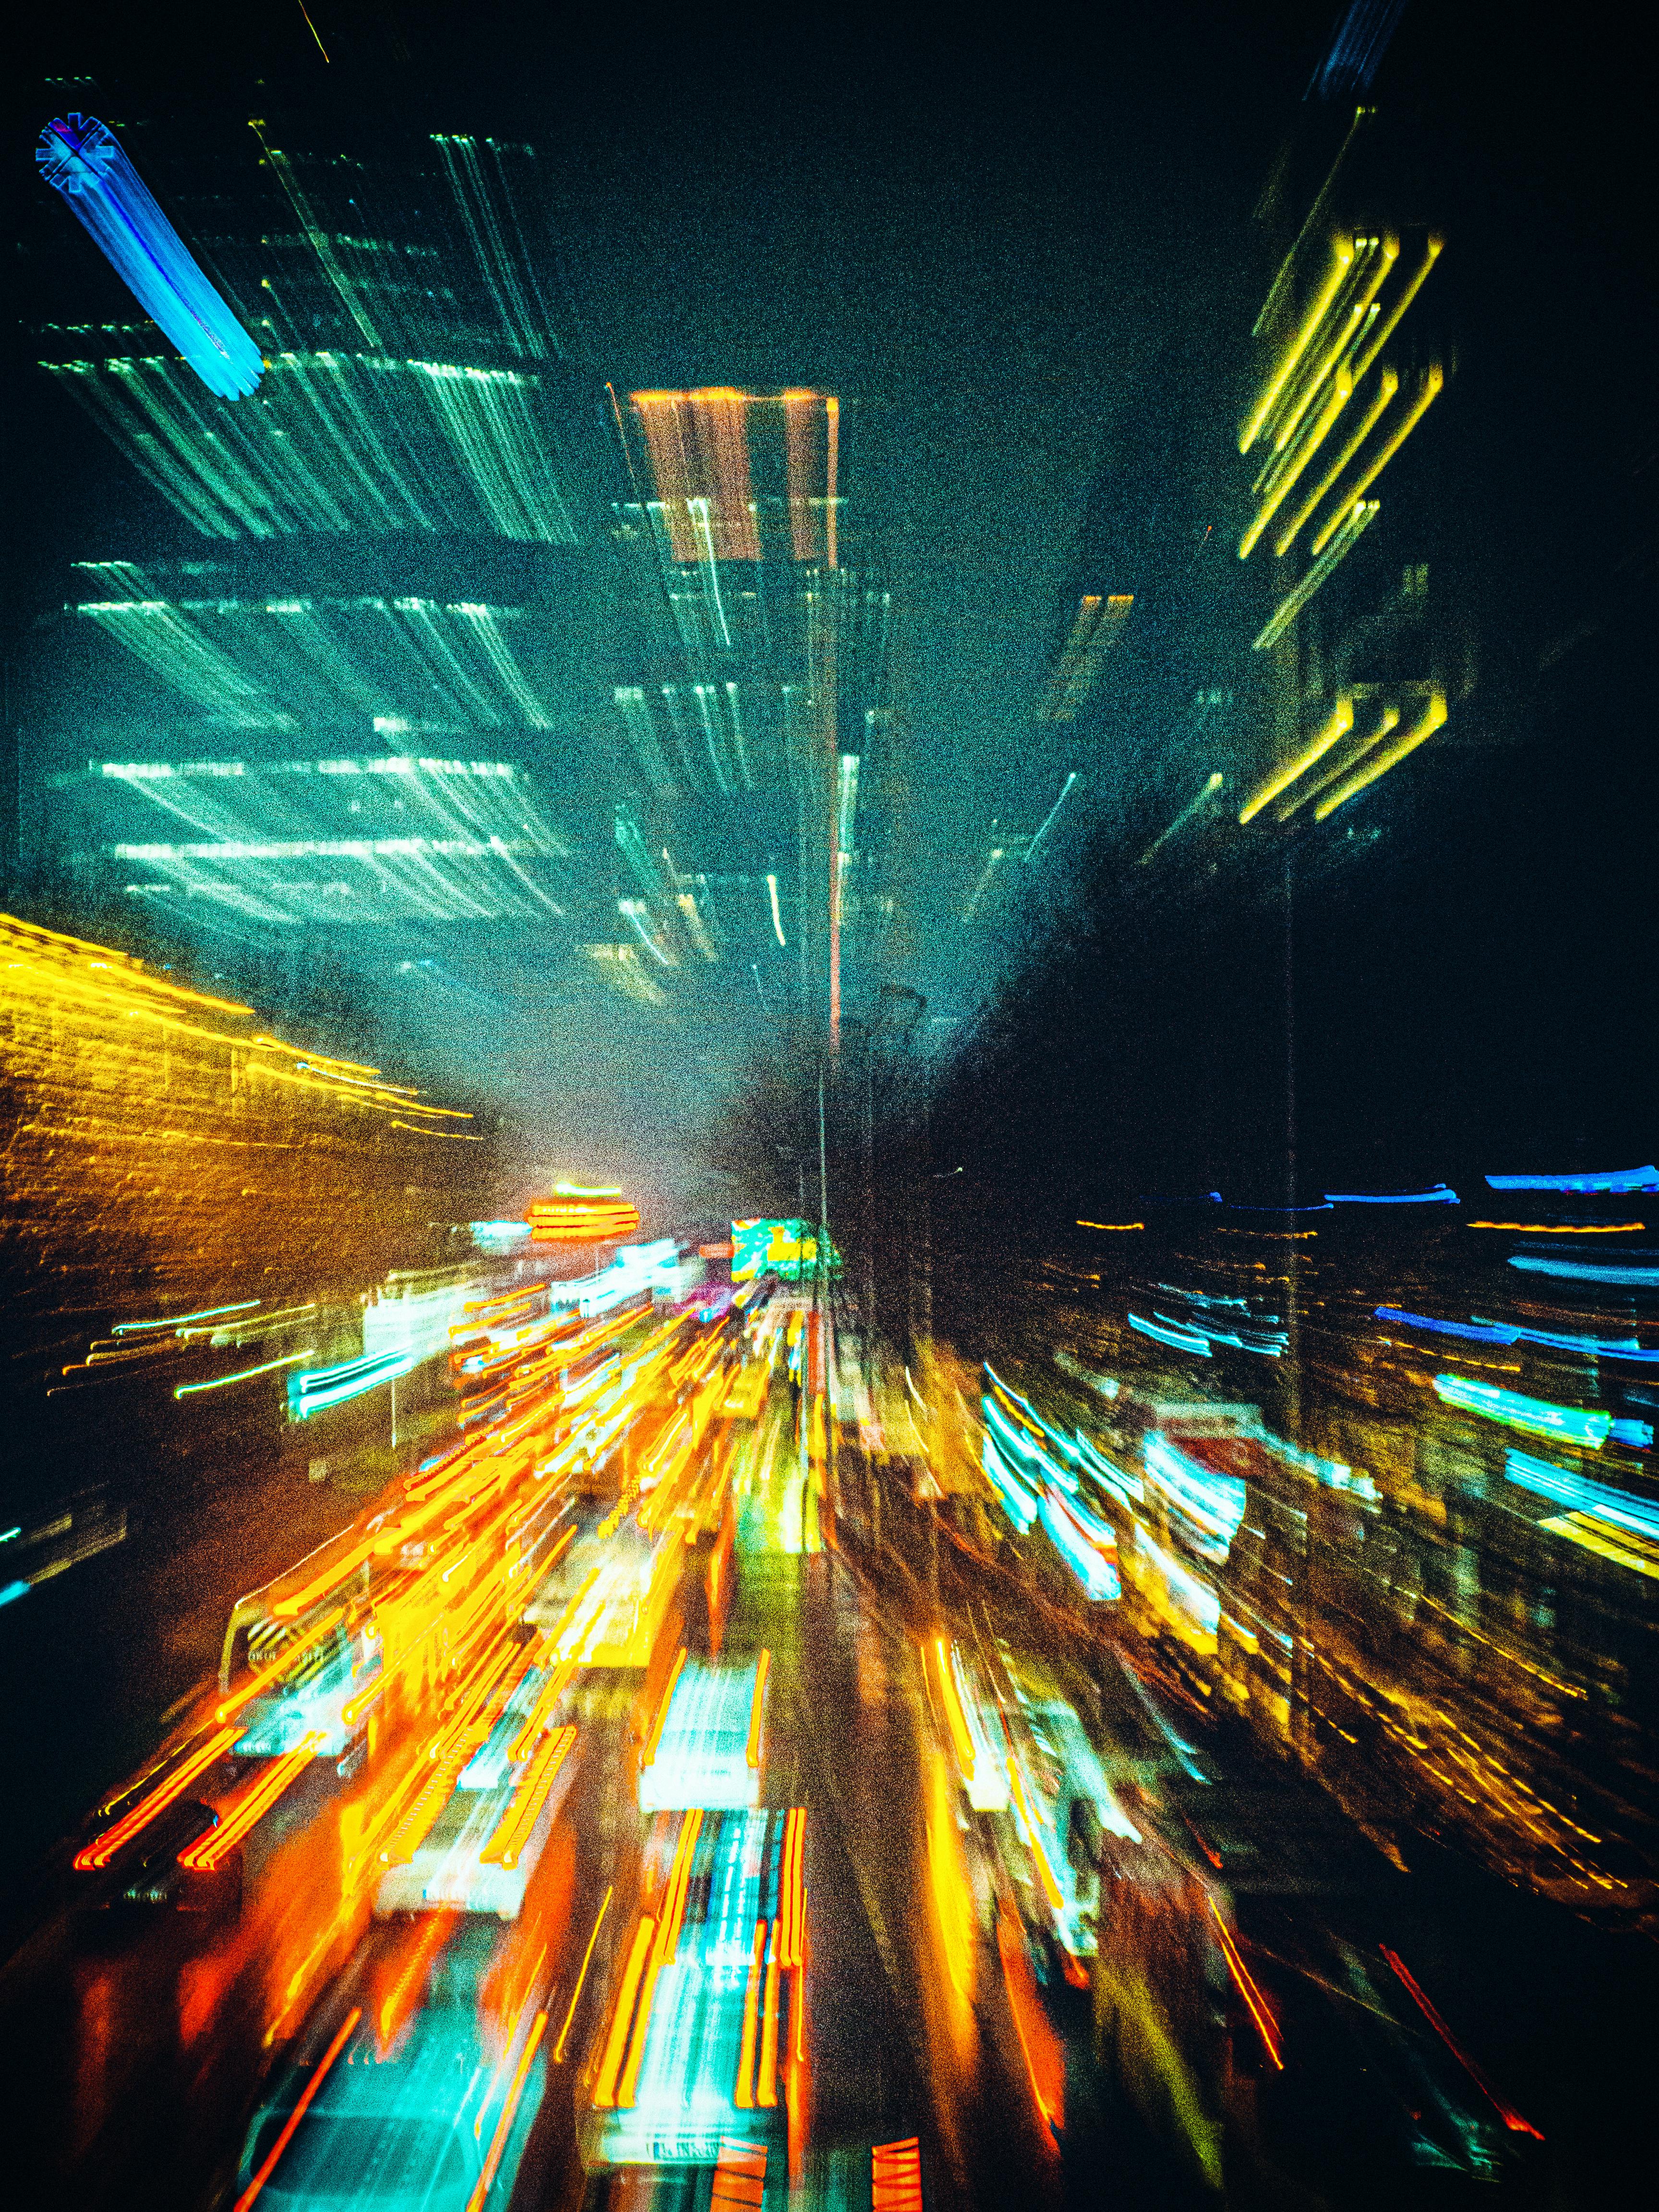
This week’s technique: Kinetic Photography

Theo Pham

Thesmart177
Enes Bayraktar
What Is Kinetic Photography?
When you hear the word kinetic, the first thing that probably comes to mind is motion, and that is exactly what this technique is built around. Kinetic photography, sometimes called camera tossing, is a style where the camera itself becomes part of the movement while taking the photo.
Instead of holding the camera steady like we normally would, you intentionally move it. That movement might be a shake, a swing, a bounce, a spin, or in some cases even a brief toss into the air. Kinetic photography overlaps with techniques like panning or intentional camera movement, both of which I already talked about a couple of weeks ago (if you remember ;)).
The results are usually unpredictable, which is part of the appeal. Some photos might look chaotic, others surprisingly beautiful. Often the photos end up looking almost like digital artwork or computer-generated/video game graphics (depends heavily on the scene of course too).
How To Do Kinetic Photography
1: Slow Down the Shutter
For the camera movement to show up in the photo, the shutter needs to stay open long enough.
Start with:
1/5s – 1 second for a bit of motion
1–5 seconds for more dramatic results
If you are shooting in bright daylight: use ISO 100, stop down your aperture (f/11–f/16), maybe use an ND filter if the scene is still too bright.
Longer exposures give you more time to move the camera and create stronger motion effects.
2: Choose a Scene with Light and Colour
Kinetic photography works best when the scene contains strong visual elements, such as:
Bright lights
Neon signs (like from Restaurants or bars)
Street lights at night
Colourful scenes
City scapes (a very popular scene)
Night scenes all together are especially good for kinetic photography because light sources stretch dramatically when the camera moves.
3: Move the Camera
Once the shutter opens, move the your camera.
You can literally try any type of motion (feel free to experiment), but here are a few ‘classic’ variations your can try:
Shake the camera
Quick movements → chaotic, energetic patterns.
Swing the camera
Smooth arcs/movements will end up in flowing streaks of colour.
Spin the camera
Rotating the camera can create spiral shapes and circular light trails.
Bounce or lift the camera
Short vertical movements → will create layered motion effects.
Move the camera forward or backward (very popular when it comes to city scapes)
Push your camera slightly toward the scene or pull it back toward yourself while the shutter is open. This often creates a tunnel blur (I would call/describe it maybe as a ‘‘laser’’ blur) where lights stretch toward the centre of the frame, almost like the photo is being pulled inward or expanding outward.
Toss your camera into the air
And yes, some photographers experiment with briefly tossing the camera upward, though this obviously carries some risk (treat carefully).
The important thing with any movement you try is that the shutter is open while doing it. (Please always use a camera strap, if you go crazy with it, your camera can literally slip out of your hand)
4: Take A Lot of Photos
Kinetic photography is unpredictable by nature. Some photos may look messy, others surprisingly beautiful. The key is to shoot a lot and find the needle in the hay stack.
Camera Settings
Shutter speed: 1/5s – 5s
Aperture: f/8 – f/16
ISO: 100–400
Focus: Pre-focus before moving the camera
Tripod: None used, handheld movement is the whole point
These settings are just a starting point. Adjust them depending on light and the strength of the effect you want. Experiment!
The Rest of this Issue is for Premium Subscribers
