📸 The Magazine For Photographers - Bite Size
Read the Latest Photography News and Updates in the Creative Industry in 3-4 minutes or less ;)

Important note: All photography articles are NOT sponsored
The Latest News:
Godox’s New AD800 Pro Outdoor Flash
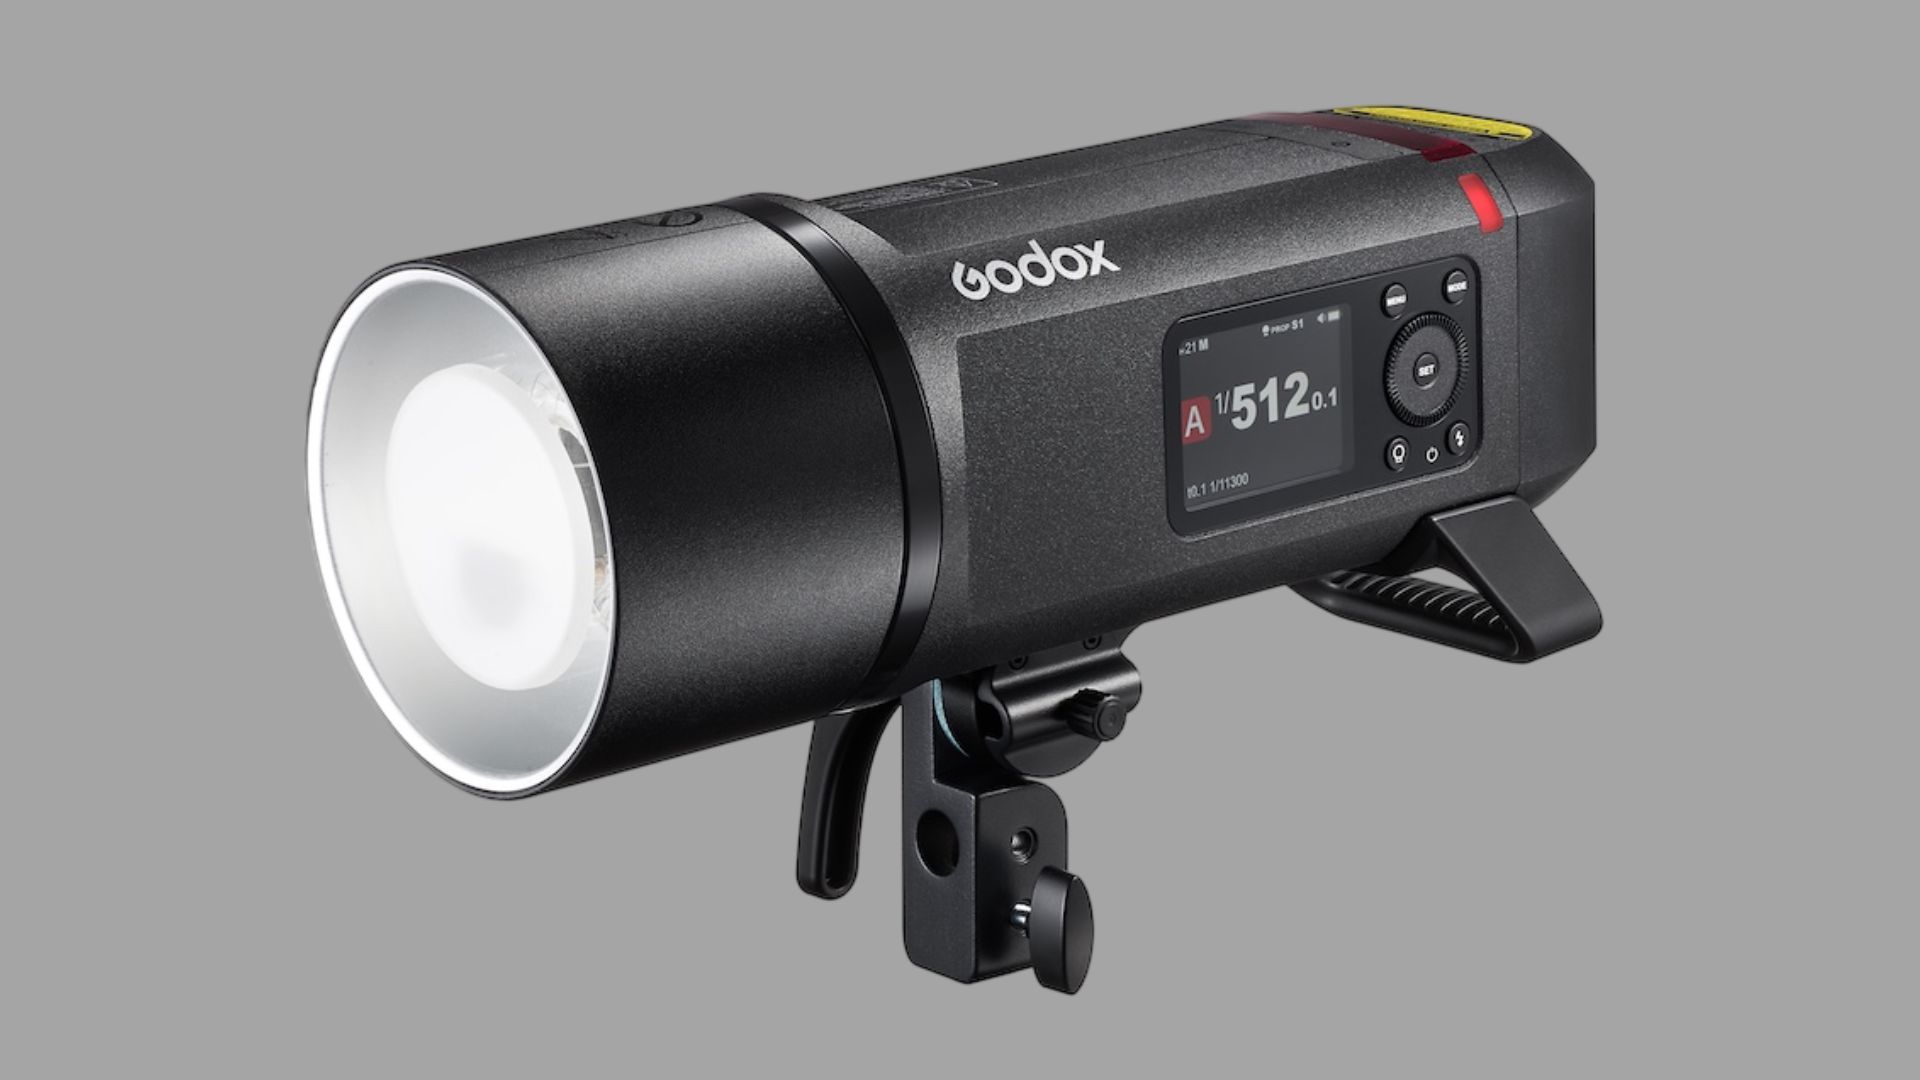
credits: Godox
Godox has expanded its outdoor flash lineup with the AD800 Pro, a battery-powered mono-light that sits above the AD600 series in terms of output and sustained performance. The flash is rated at 800 watt-seconds and uses a 28.8V / 2900mAh lithium battery, which Godox claims is good for roughly 300 full-power flashes per charge. Recycle times range from about 0.01 seconds at lower power levels up to around 1.5 seconds at full output. The unit includes an active cooling fan, which is important here, since sustained high-power use is part of the intended workload.
From a flash performance perspective, the AD800 Pro offers a wide range of control. Output is adjustable over a 10-stop range from 1/512 to full power in 0.1-stop increments. Flash duration varies significantly depending on mode. In normal operation, t0.1 ranges from roughly 1/350s to 1/11,400s, while Freeze mode pushes that as far as 1/35,710s for motion-stopping applications. A Stable Colour Temperature mode limits colour drift to ±100K, which can matter for long shoots or multi-light setups where consistency is critical. The guide number is rated at 110 with the standard reflector.
The AD800 Pro integrates fully into Godox’s 2.4GHz X wireless system, supporting TTL, manual, and multi modes across Canon, Nikon, Sony, Fujifilm, OM System, Panasonic, Leica, and Pentax when used as a receiver. It offers 32 channels, 16 groups, and ID control, with a stated wireless range of about 100 meters. Physically, the flash uses a native Bowens mount and supports the optional H600P extension head to relocate the flash tube. A 40W bi-color modeling lamp (2800K–6000K, CRI ~97) is built in. With battery, tube, and reflector attached, the unit weighs around 3.7 kg. Pricing is set at $1,200.
Leica Facing A Change Of Ownership?

credits: Leica
Recent reports suggest Leica Camera AG could be heading toward a meaningful ownership change. According to Bloomberg, financial investor Blackstone, which has owned roughly 45 percent of Leica since 2011, is considering selling its stake, potentially alongside majority shareholder Andreas Kaufmann. The company is said to be valued at around one billion euros, a number that shows just how far Leica has come over the past decade. While nothing has been officially confirmed, the news has already stirred plenty of conversation.
Blackstone originally joined Leica to help push the brand’s global expansion, especially in Asia, and by most measures that strategy worked. Leica has stayed financially healthy while doubling down on the premium end of the market. Even so, any hint of new ownership naturally raises questions, particularly given Leica’s very deliberate approach to products and long-term development. This all comes at a time when Leica has also show interest in returning to in-house sensor development.
Potential buyers mentioned include HongShan Capital Group, a major Chinese investment firm, and Altor Equity Partners from Northern Europe. For now, these talks appear to be early and exploratory. Importantly, Andreas Kaufmann could remain involved, which would mean things continue largely as they are rather than Leica suddenly heading in a completely new direction.
Download The World’s Best Lightroom Presets
Weekly Photo Technique Exploration
Welcome to a new section of the magazine where every week we will explore a new photography technique from across various photography genres.
This week’s technique: Whip Pan Photography

credits: B&H
What Is Whip Pan Photography?
In cinema, a whip pan is a fast camera movement used to create a streaked, blurry transition between scenes. In still photography, the idea is very similar, however, instead of transitioning between shots, you are using a slow shutter speed combined with a sudden camera movement to capture motion blur inside a single frame.
The result is a photo that feels energetic and cinematic, where light stretches across the frame and the subject is frozen inside (just like in the shot above).
How To Do It
Here is a practical guide on how to shoot a whip pan photo, step by step.
Dial In Your Ambient Exposure
Because motion is the whole point of a whip pan, shutter speed is your starting point. Begin by slowing your shutter until ambient light starts to register clearly.
Start around 1/10s to 1/2s
Adjust aperture and ISO afterward to fine-tune exposure
Keep ISO as low as possible while still exposing properly of course
Exact settings will depend on many things, including available light, time of day, how bright the background is, how much motion blur you want etc.
Add Off-Camera Flash (Technically Optional, But Powerful)
Adding an off-camera flash is not mandatory, but it gives you much more control, especially if people (as your subjects) are involved. Placing a flash behind or slightly off to the side of the subject does two important things → Nr 1. It creates a rim light that separates the subject from the background; Nr 2. It helps freeze the subject despite the slow shutter speed.
A Quick tip → if you want warmer skin tones at night, make sure to add a CTO gel to the flash. This lets you warm the subject while keeping the ambient background cooler.
Direct the Subject
Because the shutter will be open longer than usual, subject movement matters a lot. So, If you are photographing people, use a stable, simple pose + ask them to hold as still as possible → small movements will show up quickly at slow shutter speeds.
Capture a Clean Plate Shot
If you plan to composite later, this step is important.
Mount your camera on a tripod
Capture a clean, sharp frame of the subject
Use the same exposure and flash setup
Make sure nothing moves
→ This plate shot gives you a safety net and allows for cleaner results in post if needed.
Capture the Whip Pan Shot
Now for the actual whip pan.
Center your subject in the frame
Press the shutter
While the shutter is still open, snap the camera quickly left and right
Then stop the movement
The motion should be fast, decisive and directional. Avoid slow drifting, the ‘whip’ part comes from this sudden acceleration.
You can experiment with horizontal whips (which are most common), vertical whips (great for trees and buildings) and diagonal whips. Just try a few variations and see what works best.
Create the Composite in Post (If Needed)
If you shot a plate image:
Stack the clean shot and whip pan shot in Photoshop
Mask the subject from the clean image
Blend it into the whip pan frame
Use soft masks to avoid hard edges
If you nailed it in-camera, you may not even need this step → the more you practice the better you will get at it too!
The Rest of this Issue is for Premium Subscribers
