📸 The Magazine For Photographers - Bite Size
Read the Latest Photography News and Updates in the Creative Industry in 3-4 minutes or less ;)
In partnership with

Important note: All photography articles are NOT sponsored
The Latest News:
TTArtisan’s New AF 40mm f/2 Prime Lens
credits: TTArtisan
TTArtisan just released the AF 40mm f/2, a compact prime lens for full-frame Sony E and Nikon Z cameras, with an L-mount version expected soon. The optical design uses nine elements in six groups, including two high-index elements, one extra-low-dispersion element, and an aspherical lens to control chromatic aberrations and maintain sharpness. The aperture runs from f/2 to f/16 and is made up of seven blades, with a clicked aperture ring for manual control. This combination makes the 40mm focal length a versatile choice, slightly wider than a 50mm, but still offering a natural perspective.
Autofocus is handled by a stepping motor with a lead screw drive, giving smooth and quiet operation that should suit both stills and video. The lens can focus as close as 0.4 meters (about 16 inches), which is useful for tighter framing without switching to a macro lens. The 40mm f/2 also accepts 52mm front filters and while the lens doesn’t have optical image stabilisation, it’s small and light enough to pair well with bodies that have in-body stabilisation.
Physically, the AF 40mm f/2 is built from aluminium, weighs 167 grams (5.9 ounces) and measures 44mm in length with a 61mm diameter. The lens doesn’t come with weather sealing however. Pricing for the TTArtisan AF 40mm f/2 is at $168. A closer look at the new lens will follow in this week’s Sunday magazine issue ;)
You can see full details on TTArtisan’s website here
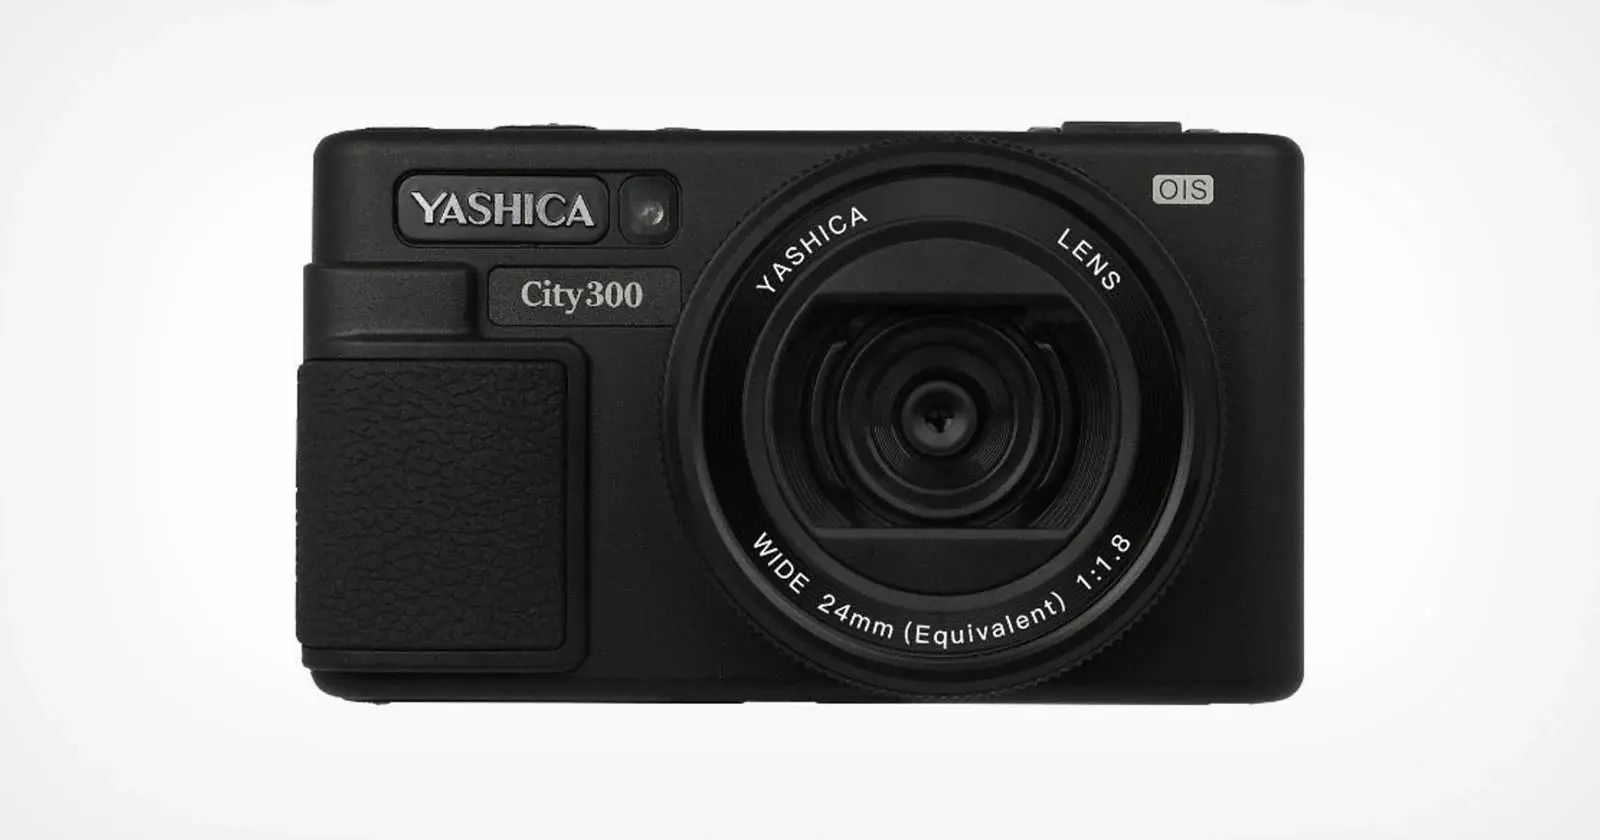
Yashica’s City 300 Compact Camera
credits: Yashica
Yashica’s new City 300 compact camera is here and it keeps the pocket-friendly charm of its predecessors but steps things up in terms of image quality and control. The camera now has a 50-megapixel Type 1/1.56 sensor, a notable leap from the 13MP chips used in the City 100 and 200. It also gains in-body image stabilization, a first for the series, helping to reduce blur when shooting handheld in tricky light. While the sensor size is still closer to what you’d find in a smartphone, it’s an upgrade for anyone who enjoyed the earlier City models but wanted cleaner, sharper results.
The fixed 24mm equivalent f/1.8 lens remains, but Yashica has made it more versatile thanks to the higher resolution. Built-in crop modes let you shoot full-res 50MP images at 24mm, 12MP files at 50mm, or 8MP shots at 60mm, all from the same lens. A new control ring makes zooming through these digital focal lengths feel like adjusting a real zoom lens, adding a touch of traditional camera handling. Another major change is RAW shooting support, giving photographers the option to work with DNG files for more editing flexibility, a big step up from the JPEG-only output of the earlier City series.
On the outside, the City 300 sticks to the minimalist design, with a slightly refined grip that should improve handling. Weighing 183 grams, it’s nearly 40 grams lighter than the City 100. The Yashica City 300 is available now for HK$3,280, which is just under $420 USD.
You can see full details on Yashica’s website here
Something You Have To Check Out
AI is something that most photographers/creatives see critically, and for absolutely good reason. HOWEVER the fact at the end of the day is that there sadly is no stopping AI, so the best thing you can do is learn how to use AI to your own advantage, whether that be with helping you with daily tasks, writing, editing, your day-job etc.
This is where the Chat-GPT Guide from Hubspot comes in. It will teach you how to use AI to your advantage, increase your work efficiency (something every creative needs) and more!
Definitely check it out, highly recommended (+ it is completely free) ⬇️
Want to get the most out of ChatGPT?

ChatGPT is a superpower if you know how to use it correctly.
Discover how HubSpot's guide to AI can elevate both your productivity and creativity to get more things done.
Learn to automate tasks, enhance decision-making, and foster innovation with the power of AI.
Weekly Photo Technique Exploration
Welcome to a new section of the magazine where every week we will explore a new photography technique from across various photography genres.
This week’s technique: Multiple Exposure Photography

What Is Multiple Exposure Photography?
Multiple exposure is when you capture more than one image on the same frame, either in-camera or in post, so that the photos merge into one. Think of it as a creative mashup, like a portrait overlaid with a city skyline, a silhouette filled with a forest, two different moments frozen into one shot etc.
In the film era, this happened by literally exposing the same piece of film multiple times. Today, most digital cameras can simulate it in-camera, and of course, you can simply blend shots in Photoshop.
Two Main Ways to Do It
In-Camera Multiple Exposure
Many modern cameras have a multiple exposure mode. This lets you shoot your first frame, then use that as a guide to frame your second (and sometimes third, fourth, or more). The camera blends them automatically.
Post-Processing Multiple Exposure
If your camera doesn’t have the feature, or you want more control, shoot each exposure separately and blend them later in Photoshop using layer masks and different blending modes (like Lighten, Screen, or Overlay).
How to Shoot In-Camera Multiple Exposures
1. Plan Your Composition
Decide on your base image first. Often, this is a silhouette or a subject with clean shapes, perfect for overlaying textures or patterns.
2. Shoot the First Frame
For example, a well-lit portrait with the subject against a bright background works well for filling their shape with another image.
3. Add the Second Frame
Look for textures, patterns, or elements that complement your first shot (so help convey a mood, tell a story, make a connection etc.):
Trees, leaves, flowers
Cityscapes or buildings
Water reflections
Star fields or clouds
4. Use the Right Exposure
The trick is balance: if your first image has dark areas, your second image will show up best in those spaces. Bright areas in the first image will overpower anything you put there.
How to Create Multiple Exposures in Photoshop
Open your images in Photoshop.
Stack them as layers, with your base image on the bottom.
Change the blending mode of the top layer (Lighten and Screen are common choices).
Use layer masks to hide or reveal certain areas and control where the second image shows through.
Adjust opacity, color grading, and contrast to make them feel like one cohesive image.
Some Typical Multiple Exposure Ideas
Silhouette Fill: Take a side-profile portrait, then fill the inside of that silhouette with a forest, mountain range, city skyline.
Day + Night Blend: Combine a daytime shot of a scene with a night shot of the same spot for a time-lapse effect in one frame.
Motion Story: Combine multiple shots of a moving subject into a single composition (popular subjects for this are: dancers and skateboarders).
Download The World’s BEST Lightroom Presets

Transform your photos with my Lightroom Presets created from years of editing experience!
The Rest of this Issue is for Premium Subscribers
